How to integrate Alloy Navigator Express with Microsoft 365 mailboxes
Updated in 2021.1
This article describes how you can set up email settings in Alloy Navigator Express to work with your Microsoft 365 (former Office 365) email accounts.
Why should you integrate Alloy Navigator Express with your email service?
Alloy Navigator Express can receive and send email. To male it happen, you should integrate Alloy Navigator Expresswith your Exchange Online service.
-
Inbound mail flow: Alloy Navigator Express can convert incoming email messages to Service Desk tickets. These can be messages from technicians and end-users, or automated email notifications from various third-party hardware and software monitoring tools. Alloy Navigator Express processes incoming email messages using a special tool— the Mail Connector. You set up and manage individual Mail Connector jobs for each Microsoft email account you want to process. For more details about processing incoming email, see Administration Guide: Processing incoming email.
For instructions on integration with Exchange Online, see Incoming email processing settings below.
-
Outbound mail flow: Alloy Navigator Express can send outgoing email notifications and alerts in response to various events, such as ticket assignments or approaching due dates. For more details about outgoing notifications, see Administration Guide: Configuring and controlling outgoing notifications.
For instructions on integration with Exchange Online, see Settings for outgoing email notifications below.
Deprecation of Basic Authentication in Exchange Online
In 2022, Microsoft is retiring Basic Authentication in Exchange Online for all tenants—for security reasons. All Exchange Online users are expected to move to OAuth 2.0-based Modern Authentication, which is an umbrella term for multiple authentication and authorization methods. For more details, see Deprecation of Basic authentication in Exchange Online.
Starting with version 2021.1, all Alloy products support the OAuth 2.0-based Modern Authentication. As part of the migration to Modern authentication in Exchange Online, you may need to update your email settings in Alloy Navigator Express.
About Automation Server
All email operations in Alloy Navigator Express are run by the
INFO: For details, see Administration Guide: Automation Server.
Incoming email processing settings
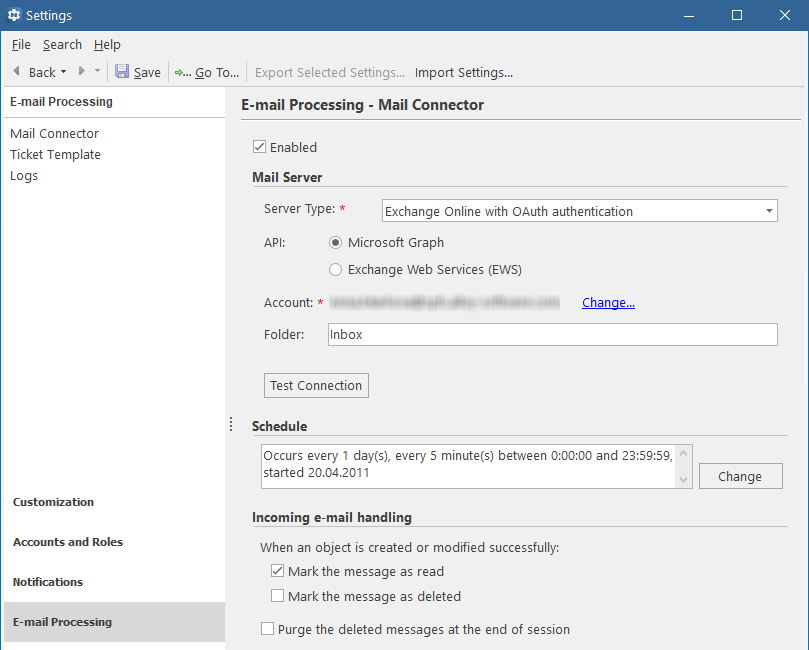
You set up and manage the Mail Connector in the Settings App, in the E-mail Processing > Mail Connector section.
Exchange Online is part of the Microsoft 365 suite of products. By Microsoft account here we understand a Microsoft work account with a mailbox (a mailbox-enabled account.
To configure incoming mail settings for Microsoft Exchange Online with OAuth authentication:
-
Launch the desktop Settings App.
-
-
Under API, choose the Microsoft Graph option. Microsoft Graph API usage ensures the latest Microsoft standards in Microsoft 365 mail protocols for very latest in security and connectivity.
The other available API option is Exchange Web Services (EWS). However, Microsoft Graph offers improvements over EWS in terms of security, simplicity, and efficiency. Microsoft strongly recommends switching to Microsoft Graph to take advantage of these improvements, all through one single endpoint.
-
Under Client, decide which app registration to use. You can rely on the pre-registered app or register your custom app in Microsoft Entra ID (Azure AD) and provide your Application (client) ID (Client ID) and other settings.
For instructions, see Settings Help: Configuring Exchange Online settings.
-
Click the Sign in hyperlink to sign in to your Microsoft account. If you're already signed in with one account, you can change it by clicking the Change hyperlink and choosing another account.
-
Specify which folder on the server the Mail Connector will monitor for incoming messages. The default folder is "Inbox". If needed, you can use a subfolder, such as "Inbox/Support".
-
Click Test Connection to verify that the Mail Connector can access the specified mailbox.
Next steps
You can proceed as follows:
-
Customize the schedule. For instructions, see
-
Test the job to make sure it works correctly. For instructions, see Administration Guide: Checking Results of the-Mail Connector Job.
Settings for outgoing email notifications
For outgoing email, your mail server settings must have similar configuration. You may want to use the same Exchange Online email account that the Mail Connector already uses.
To configure outgoing mail settings for Microsoft Exchange Online with OAuth authentication:
-
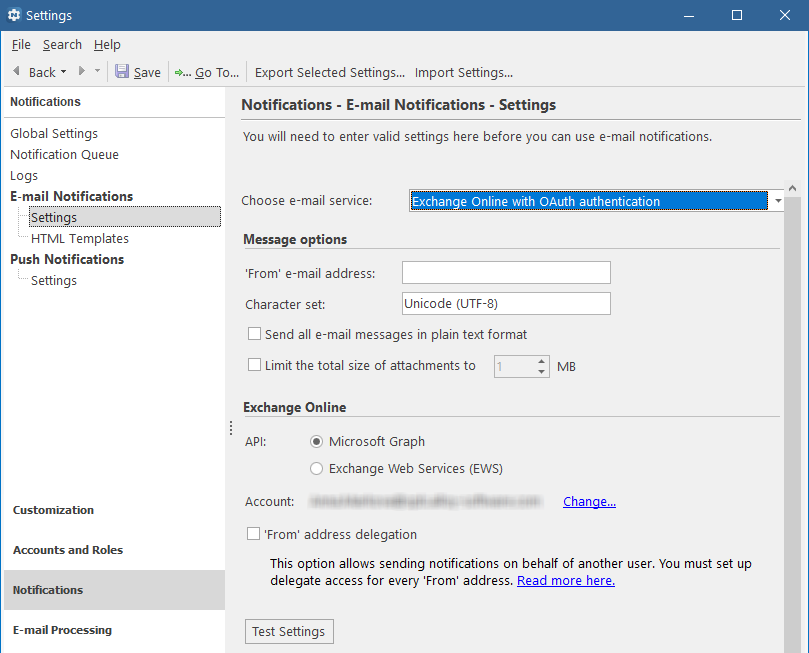
In Settings, go to Notifications > E-mail Notifications > Settings and choose Exchange Online with OAuth authentication from the Choose e-mail service list.
-
Under Exchange Online, choose the Microsoft Graph API option.
-
Under Client, decide which app registration to use. You can rely on the pre-registered app or register your custom app in Microsoft Entra ID (Azure AD) and provide your Application (client) ID (Client ID) and other settings.
For instructions, see Settings Help: Configuring email notifications for Exchange Online.
-
Click the Sign in hyperlink to sign in to your Microsoft account. If you're already signed in with one account, you can change it by clicking the Change hyperlink and choosing another account.
-
Click Test Connection to verify that the Mail Connector can access the specified mailbox.
INFO: For additional information, see Administration Guide: Integration with Microsoft Exchange Online.
Next steps
You can proceed as follows:
-
Configure sending notifications on behalf of another user. For instructions, see Administration Guide: How to enable sending email on behalf of another person.