Configuring View Forms for the Self Service Portal
Updated in 2025
The Self Service Portal uses View Forms to display the details of existing objects: Approval Requests, Computers, Hardware, Incidents, Library Items, Reservations, Service Catalog Items, and Service Requests.
NOTE: The appearance of Announcements and Knowledge Base Articles in the Self Service Portal is controlled using standard cascading style sheet (CSS) rules. For instructions, see Customizing KB Article styles.
Unlike standard Action Forms that you use in interactive actions, View Forms do not require user input, they only display object attributes. That is why read-only View Forms do not support some features of other Forms, such as wizard style or validation rules for entered values.
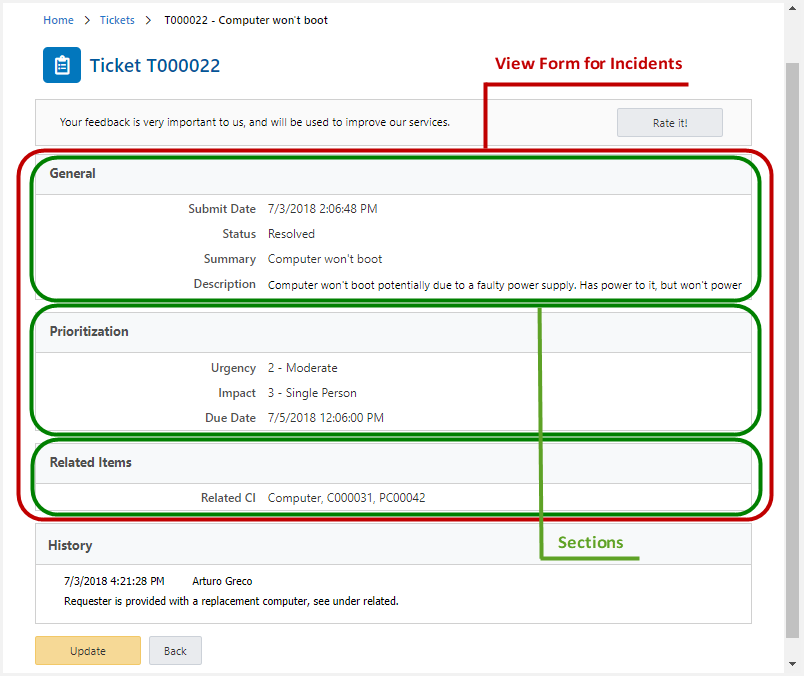
NOTE: The Self Service Portal may show some other object properties besides those that the View Form displays. For example, the History section in the screenshot below shows the details from the Activity Log in addition to the View Form fields and the Rate it! invitation panel. This design is system and cannot be customized.
A View Form contains fields, including virtual fields:
-
Physical fields represent object properties and are directly related to data fields in the database, such as Incident's Status, Submit Date, or Summary.
-
Virtual fields are temporary fields for displaying dynamic content (macros and field values of other objects). For example, the View Form for Computers may display the Asset Tag value of the Asset associated with the current Computer.
View Form contains of two columns: the content area and the side panel. Each column is divided into sections to make it easier to read. Each section would have a caption and individual text, if needed. You can control the content of columns and the visibility of each section using a logical condition. When the View Form opens, Alloy Navigator checks the section condition, and displays the section only when the condition is true.
You configure the View Form for a particular object class in the Self Service Portal > Workflow section, under [Object Class] > View Form.
To configure a View Form:
-
Specify the general properties of the View Form:
-
Object (read-only): Object class for which the View Form is created.
-
Name: View Form name.
-
Description: View Form description.
-
Under Fields, specify the View Form contents: fields, sections, and text.
-
New: Click and select the element to add to the Form:
-
Field: Brings up the Form Field window, where you can configure a new field on the View Form.
-
Section: Brings up the Section window, where you can configure a new section for the View Form.
-
Text: Brings up the Text window, where you can specify static or linked text to be displayed on the View Form.
-
Edit: Opens the Form Field window, Section window, or Text window, where you can modify the selected field, section caption, or text.
-
Delete: Deletes the selected field, section separator, or text.
-
Move Up / Move Down: Moves the selected field, section separator, or text up or down on the View Form, inside a column or between columns.
NOTE: When you move or delete a section, you move or delete only the separator but not the fields.
-
Click OK.