How to set up Alloy Self-Service (for administrators)
Introduced in 2022.1
Updated in 2023.1
For Alloy Navigator admins
This article
API integration and API URL
The Alloy Self-Service mobile app integrates with Alloy Navigator via the API. That's why you need to make sure you have the Alloy Navigator API module installed and configured for the Access Token user authentication. For details, see Installation Guide: Installing and Configuring the API Module.
Share the API URL with end-users, instructing them to specify this URL during the first sign-in. To streamline the onboarding experience, consider providing a QR code for the API URL. This QR code can optionally include the username, further enhancing the ease of getting started.
INFO: For instructions on how to create QR codes for mobile users, see How to generate QR code for Alloy mobile apps.
SSP customer accounts for end-users
Mobile app users must have SSP Customer accounts in Alloy Navigator.
INFO: For more information, see Administration Guide: Creating and Maintaining SSP Customer Accounts.
Web-based Self Service Portal
The Self-Service mobile app does NOT require the web-based Self Service Portal; it is an independent application for self-service. You may use the mobile app as the only communication channel for end-users or use it along with the web-based Self Service Portal—it is up to you.
INFO: For more information, see Installation Guide: Installing and Configuring the Self Service Portal.
Self-Service mobile app configuration
The Alloy Self-Service mobile app configuration is an XML document that controls various aspects of the app's interaction with Alloy Navigator. That XML configuration must be stored in the database.
Starting with version 2022.1, Alloy Navigator comes with the default configuration for the Alloy Self-Service mobile app. It is included in the default workflow and contains everything to get started. If you do not have the Alloy Self-Service mobile configuration in the database, you will have to import it to Alloy Navigator first. You will be able to download the XML configuration using the download link in the instruction below.
How do you know if you need to import the configuration?
The Self-Service mobile app configuration may be missing

Optional: Import the configuration to Alloy Navigator
If you do not have SelfServiceMobile configuration in the database or when you want to revert to defaults, use the instruction below to import the default Alloy Self-Service mobile configuration. You will need the desktop Settings App for this task.
To import the default configuration for the Alloy Self-Service mobile app:
-
Unzip the archive.
-
In the Settings App, click Import Settings on the toolbar and import the XML bot configuration file.
INFO: For detailed instructions, see Help: Importing configuration settings.
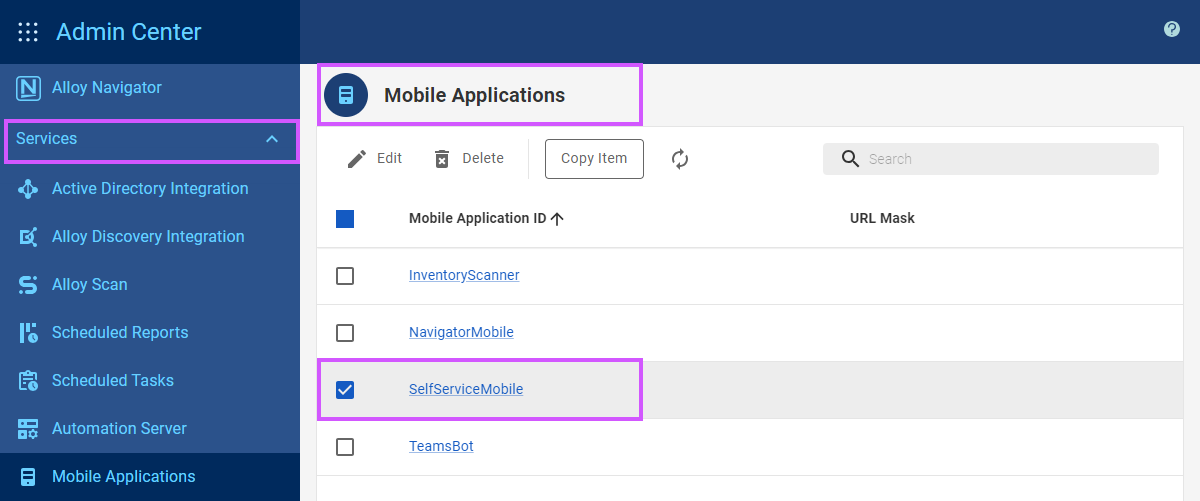
Once the import is complete, the imported configuration will be available under Services > Mobile Applications. Its name is SelfServiceMobile.
Customize the Self-Service mobile app configuration
The default mobile configuration is the best choice for most organizations. However, administrators can access the configuration settings and make some customizations. To access the Self-Service mobile app configuration, access your web-based Admin Center or launch the Settings App, navigate to Services > Mobile Applications and open the SelfServiceMobile record.
INFO: For instructions about the web-based Admin Center, see Admin Center Help: Alloy Self-Service mobile app configuration. For instructions about the desktop Setting App, see Settings App Help: Alloy Self-Service mobile app configuration.