Adding a Localization Dictionary to the Self Service Portal
Updated in 2024
On-prem only
Once you prepared a localization dictionary as described here, you can add it to the Self Service Portal. Please note that the name of your custom localization file must follow the <LCID>.json format. For example: tr-TR.json, sk-SK.json, ja-JP.json.
FOR CLOUD CUSTOMERS: Please note that adding custom languages is only available for on-premises deployments. Contact our Support Team for assistance with this step.
To add a new language to an installed and configured Self Service Portal:
-
Put your JSON localization dictionary to the localization directory under the folder where Alloy web applications store their templates. Typically, here:
C:\Program Files\Alloy Software\Alloy Navigator\System\WebAppsTemplates\SSP\localization -
Put your JSON localization dictionary to the localization directory of under the Self Service Portal installation folder. Typically, here:
C:\Program Files\Alloy Software\Alloy Navigator\WebApps\SSP\<Site Name>\<Directory Name>\localization<Site Name>is the name of the site where the Self Service Portal is installed<Directory Name>is the name of the virtual directory where the portal is installed
For example:
C:\Program Files\Alloy Software\Alloy Navigator\WebApps\SSP\Alloy Navigator Site\hd\localization -
Start the Web Configuration tool and go to the Features > Select Languages page. Your newly added language pack will be listed there.
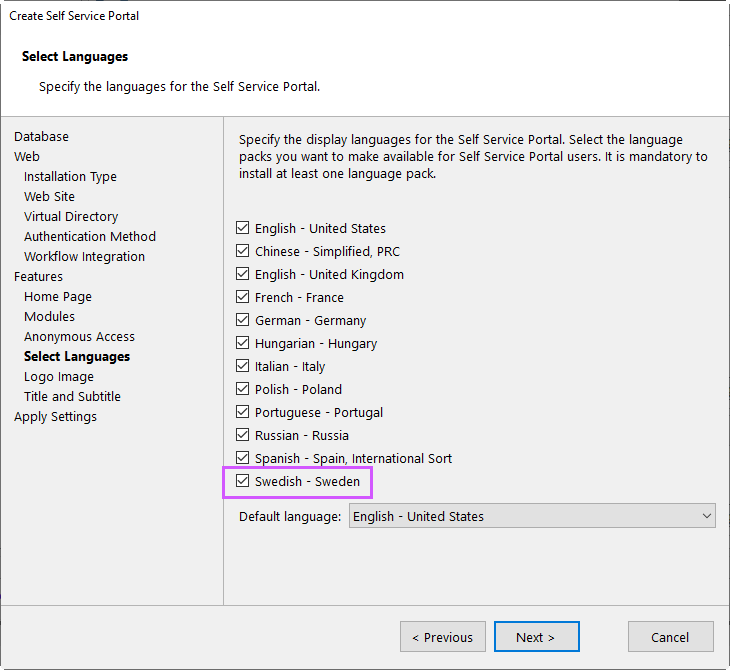
TIP: If the new language does not appear on the Select Languages page, ensure the JSON file is correctly placed and try restarting the Web Configuration tool.
-
Select the corresponding check box, then proceed to the last page and click Apply. The new language will be available in customers' profiles.
INFO: For details on the Web Configuration tool, see Web Components.