Customizing quick view forms
Introduced in 2025
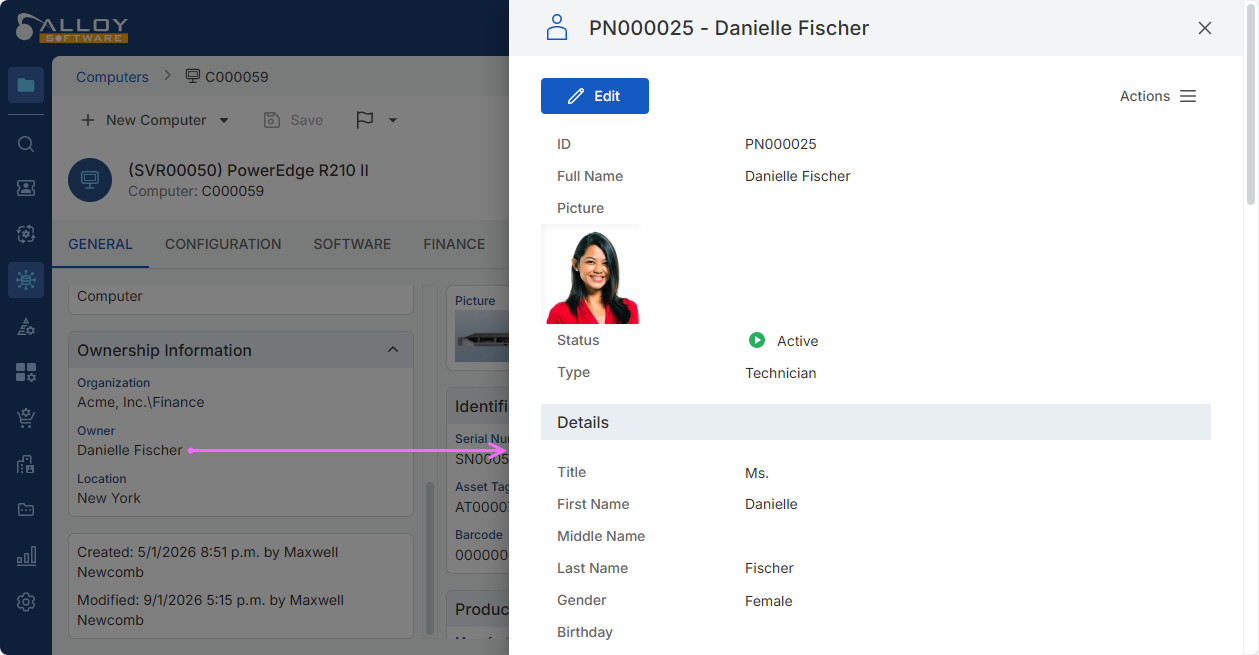
Users can quickly view associated objects without opening them and getting away from the current object record. To show such a preview, select View from the three dot menu in the corresponding field, and the view form flies out. This article describes how to customize what users see in these quick view forms, also known as "preview flyouts."
About quick view forms
A quick view form contains object fields, which could be physical or virtual:
-
Physical fields represent object properties and are directly related to data fields in the database, such as Ticket's Status, Submit Date, or Summary.
-
Virtual fields are temporary fields for displaying dynamic content (macros and field values of other objects). For example, the preview form for Approval Requests may display the Summary of the object the request applies to.
When a quick view form has many fields, they may be grouped into sections to make it easier to read. Each section would have a caption and individual text, if needed. The visibility of each section can be controlled by a condition, a logical operation based on object field values and system macros. When the form is opened, Alloy Navigator Express checks the section condition, and displays the section only when the condition is true.
Alloy Navigator Express comes with the default quick view forms for all object classes. You can customize these forms: add new fields, re-organize fields into sections, change the display order, remove unneeded fields, etc.
TIP: You may want to export your current form definition for backup purposes before making any changes. For details, see Exporting configuration settings.
Customize quick view forms
To customize a quick view form:
-
In the
Alliteratively, you can access the preview form definition under
-
Add new form elements as needed:
-
Click Add > Field and configure the field:
-
For an Object field, select a physical object field and optionally set the label (only if you want to override the field name on the form.).
-
For a Virtual field, enter the field name and select a data type. If the field is a Reference, specify the referenced class. Set the label only if you want to override the field name on the form. Then define the value to display. The value can be static text combined with dynamic content, or a SQL expression or script that returns a single dynamically calculated value.
TIP: To use a dynamically calculated value, configure the virtual field in the Settings App.
-
-
Click Add > Section to insert a section separator.
TIP: To use a conditional section, configure the section in the Settings App.
-
Click Add > Text to add static text or a link.
TIP: To use dynamic text with placeholders, configure the text in the Settings App.
-
-
Modify existing form elements:
-
Edit field settings, section captions, or text as required.
-
-
Reorder form elements:
-
Drag fields, section separators, or text to the desired position, or use the Move Up / Move Down buttons.
-
-
Remove unnecessary elements:
- Delete the existing fields, section captions, or text you do not want on the form.
NOTE: When you move or delete a section, only the section separator is affected. The fields within the section are not moved or deleted.
-
Save the form to apply your changes.