How to create a zap
See our step-by-step instructions to create two simple Zaps:
Send a Message to a Slack channel when an Incident is submitted in Alloy Navigator
Let's create a Zap that will trigger an action in an external app when an event in Alloy Navigator occurs.
In this example our Zap will post a message to your Support Team's Slack channel when a new
-
Go to the list of Alloy Navigator integrations with Slack and sign in to Zapier using your Zapier account.
-
In the Select a trigger list, select Alloy Navigator: New
-
In the Select an action list, select Slack: Send Channel Message.
-
Click Connect Alloy Navigator + Slack.
-
Under Choose Account, provide the URL of Alloy Navigator API's endpoint and the credentials of your Alloy Navigator account.
INFO: For details, see Alloy Navigator API endpoint URL and Alloy Navigator account for integration.
-
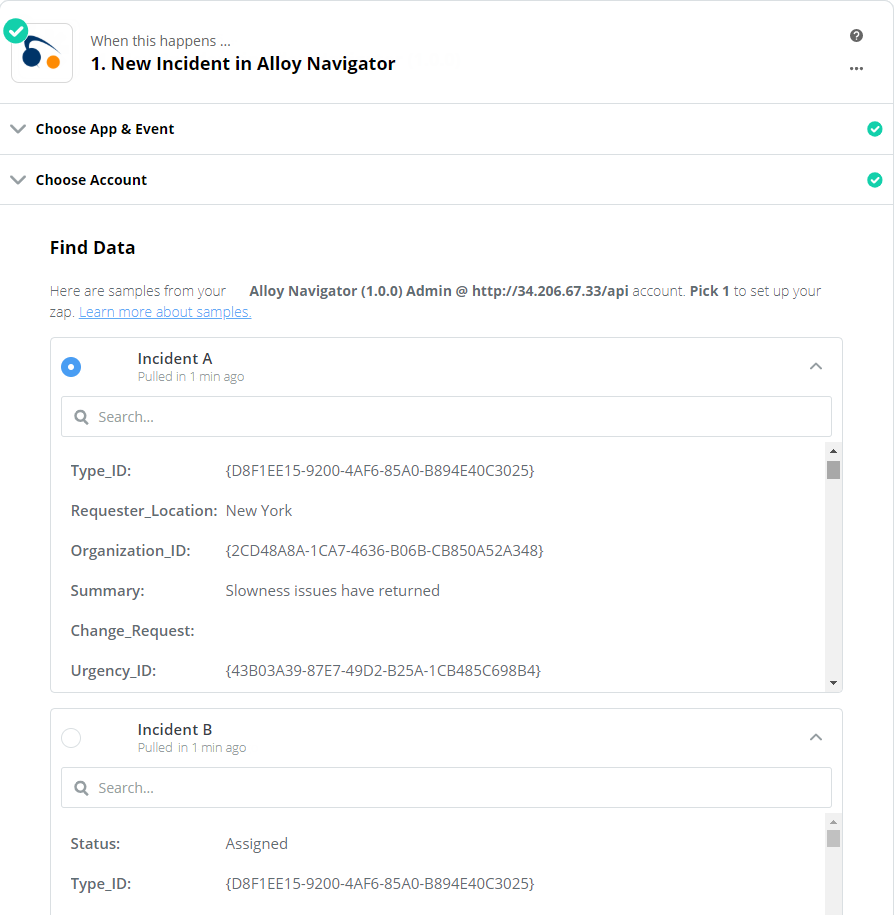
Now Zapier wants to test your connection to see if it can find a
-
Wait a second and see the information about your newly created
-
Note that all
-
Under Do this: Send Channel Message, sign in to your Slack workspace when asked for a Slack account: enter your workspace’s Slack URL and provide your Slack credentials.
-
Customize your Send Channel Message action: select a channel, specify the message text (use placeholders for available
-
Allow Zapier to test the Action.
-
Your Zap is ready. Do not forget to give it a distinctive name..
Now you can turn your Zap on and let the information flow from Alloy Navigator to Slack workspace.
Submit an Incident when a CloudWatch Alarm state changes
And now let's create a zap that will trigger an action on Alloy Navigator when an event in an external app occurs.
Amazon CloudWatch is a monitoring service for AWS cloud resources and the applications you run on AWS. See how you can create a Zap that will trigger an Alloy Navigator
-
Go to the list of Alloy Navigator integrations with Amazon CloudWatch and sign in to Zapier using your Zapier account.
-
In the Select a trigger list, select Amazon CloudWatch: Alarm State Changes.
-
In the Select an action list, select Alloy Navigator: Create
-
Click Connect Amazon CloudWatch + Alloy Navigator.
-
Under Choose Account, provide the AWS Access Key ID and the AWS Secret Access Key.
IMPORTANT: AWS recommends that you use a severely restricted key that only has access to the specific resources you want to use. It is recommended to create a new user for the integration.
-
Under Customize State Change, choose your region and the Alarm to monitor. Allow Zapier to test the connection.
-
Wait a second and see the information about your Alarm retrieved from CloudWatch by Zapier.
-
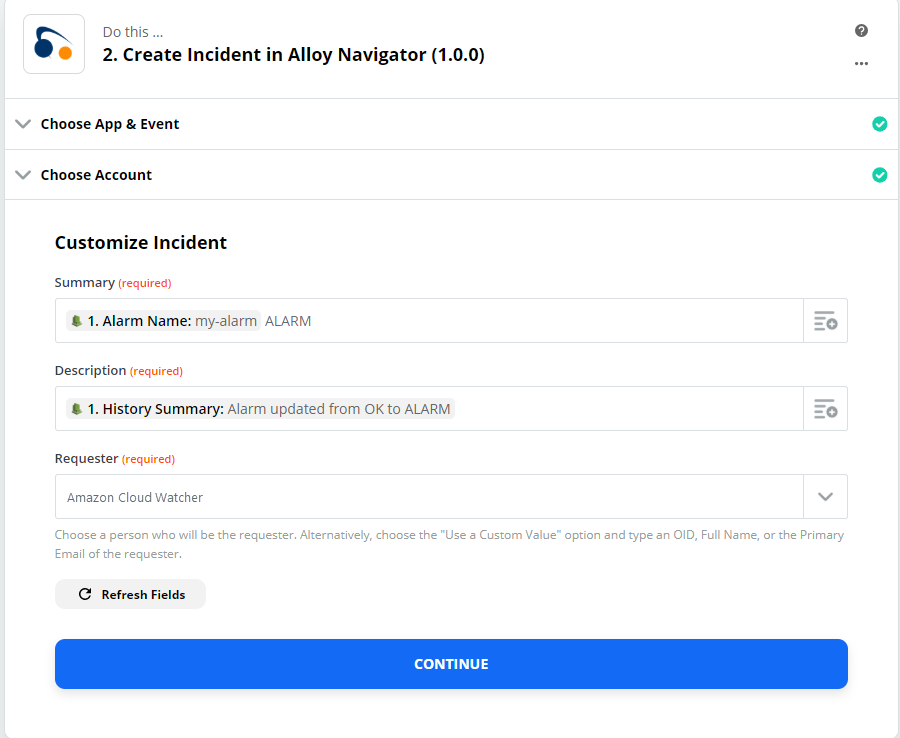
Under Do this: Create
INFO: For details, see Alloy Navigator API endpoint URL and Alloy Navigator account for integration.
-
Create a template for auto-created
-
Allow Zapier to test the Action.
-
Your Zap is ready. Name it.
Once you turn on the Zap, Zapier will automatically submit
What's Next
There are more examples for your inspiration:
-
Convert Messages in Microsoft Teams into Incidents in Alloy Navigator
-
Integrate a PureChat solution into the Alloy Navigator Self Service Portal and automatically create
Contact our Support Team, and we will help you to set up the integration and let Alloy Navigator and Zapier automate your workload.