Adding Action Forms
To add a Form, follow the steps below:
- From the Sidebar, navigate to Workflow and Business Logic > [Module] > [Object Class] > Workflow > Components > Forms.
- Click New. The [ActionFormName] dialog box opens.
- By default, the Name field is initialized with
ObjectClassActionFormSeqNo(for example,IncidentActionForm00001). You can keep this auto-generated name, or customize it as needed.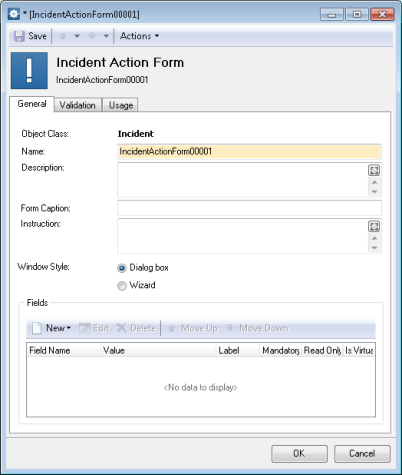
- Optional: Enter a description.
NOTE: The specified name and description are used only to identify this workflow component in the Settings; they will not be visible at runtime.
- Type a caption of the pop-up dialog box or wizard in the Form Caption field.
- To give the user instructions on how to fill out the Form, type it into the Instruction field.
NOTE: If this Form is used in a Create Action that produces Recurrent Tickets, the specified form caption and instructions will be displayed on the Data tab of the Recurrent [Class of Ticket] dialog box shown when configuring a Recurrent Ticket in the Desktop App. For details, see Help: Managing Recurrent Tickets.
- By default, Forms appear as dialog boxes. If you want to display the Form as a wizard, under Window Style, click Wizard.
INFO: For details on window styles, see Window Style: Dialog Box or Wizard.
- Under Fields, specify fields that you want to appear on the Form.
- To add a physical field, see Adding Physical Fields on Forms.
- To add a virtual field, see Adding Virtual Fields on Forms.
Add as many fields as needed. If you want to remove a field from the Form, select it and click Delete.
NOTE: Alternatively, you can first add sections (or wizard pages) to your Form, and then populate them with fields. For details, see Organizing Elements on the Form.
- Now you can organize your fields on the Form. Follow the instructions Organizing Elements on the Form.
- If you want to check if data was entered correctly, click the Validation tab and configure validation rules. Follow the instructions Configuring Form Validation.
- When done, click OK.