Grouping
You can group records by one column, or by a series of columns. Network Inventory offers the following tools for manual grouping records:
-
the Group by This Column command of grid pop-up menu.
-
the Group Panel.
-
the Grouping tab of the Customize View window.
NOTE: Once you group records by a column, they get automatically sorted by this column.
When the records are grouped by multiple columns, you can change the order of grouping levels either by using the Group Panel or the Grouping tab of the Customize View window.
To group records by using the grid pop-up menu:
-
Right-click the heading of the first column you want to group records by and choose Group > Group by This Column from the pop-up menu.
-
If you want to group by more than one column (create subgroups), repeat the first step for every column you want to group records by. Each next grouping creates subgroups inside previously created groups.
To group records using the Group Panel:
-
Make sure the Group Panel is shown. For details, see Showing and hiding the Group Panel.
-
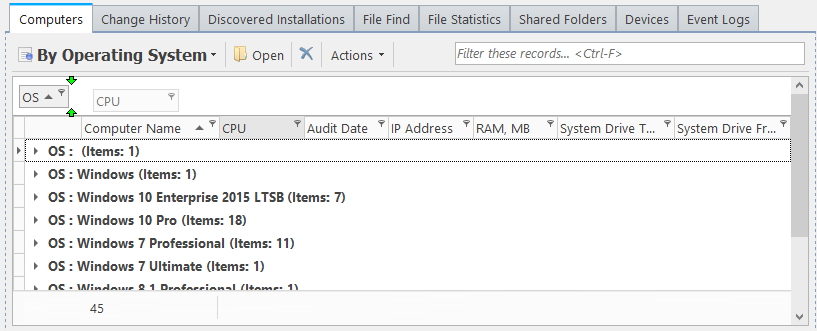
Drag the heading of the first column you want to group records by to the Group Panel.
-
If you want to group by more than one column (create subgroups), drag the heading of the next column to group by to the Group Panel. Repeat this action to create as many subgroups as you need.

Grouping records by dragging a column heading to the Group Panel
To group records using the Grouping tab of the Customize View window:
-
Click View > Customize View on the main menu to open the Customize View window and click the Grouping tab.
-
In the Available Fields pane, double-click the field by which you want to group records.
-
If you want to organize multi-level grouping, repeat Step 2 for each field by which you want to group the records.
-
Click OK.
To change the order of grouping levels on the Group Panel:
-
Make sure the Group Panel is shown. For details, see Showing and hiding the Group Panel.
-
The order of columns in the Group Panel (from left to right) defines the order of the grouping levels. Using drag-and-drop operations, place the columns in the desired order.
-
Click >OK.
To change the order of grouping levels on the Grouping tab:
-
Click View > Customize View on the main menu to open the Customize View window and click the Grouping tab.
-
The order of columns in the Group by These Fields pane defines the order of the grouping levels. Place the columns in the desired positions by using the Move Up and Move Down buttons.
-
Click >OK.