Get around the portal
The Self Service Portal opens on the homepage, your starting point for everything you need. From here, you can search for solutions, submit tickets, browse helpful articles, and track your updates. You can also navigate the portal using the main menu, which gives quick access to all areas of the portal.
Homepage
Your homepage may look a little different, as your administrator can customize the layout and choose which sections to show, but it will be similar to the image below. Read on to learn about all the elements and what they do.
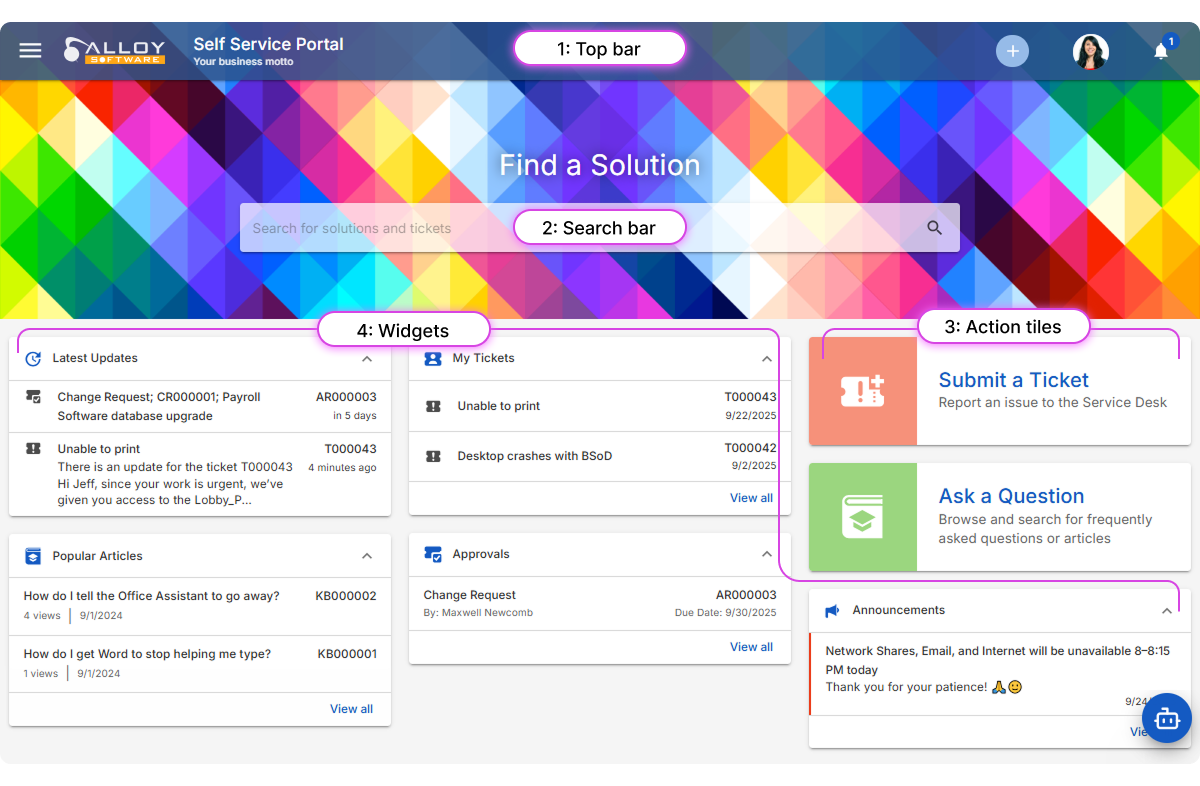
1: Top bar
At the very top of the page, you’ll find quick-access tools:
-
Three-line button: Opens the navigation menu, giving quick access to all areas of the portal.
-
Plus button (+): Opens the Report a Technical Issue form, where you can describe your problem and request IT assistance.
-
Your avatar: Gives access to your profile and personal preferences. For details, see Your profile.
-
Notification bell: Displays all important notifications and alerts, with the number indicating unread ones. For details, see Notifications
2: Search bar
At the top of the homepage is the Search bar, which looks across all items available to you in the portal:
-
Knowledge Base articles
-
Your tickets (including those where you are a collaborator)
-
Your assets and lending library items
For example, entering "printer" may show a knowledge article with troubleshooting steps, or it may bring up one of your existing tickets or company printers that can be lent. This helps you find the right course of action, whether it's solving the issue yourself or following up on an open request.
NOTE: If you are a manager, the search will cover a wider set of items, giving you access to more results.
3: Action tiles
Below the search bar, you’ll find
-
Submit a Ticket: Opens the Report a Technical Issue form, where you can describe your problem and request IT assistance.
-
Ask a Question: Takes you to the Knowledge Base, where you can browse helpful articles and search for answers to common issues.
These tiles are the quickest way to get started when you already know what you need to do.
4: Widgets
Scrolling down the homepage, you’ll find several widgets that give you quick access to useful information:
-
Latest Updates: Shows the most recent activity on your tickets, service requests, approvals, and reservations.
-
My Tickets: Displays your open and past tickets for easy tracking.
-
Approvals: Lists requests waiting for your review, with a direct link to open each item.
-
Popular Articles: Shows the most-read knowledge articles, which can often help you resolve issues on your own.
-
Announcements: Displays important updates, such as planned outages or policy changes.
NOTE: Your organization’s homepage may have more or fewer widgets, depending on how your administrator configured the portal.
Notifications
The portal keeps you up to date with push and email notifications. For example, you might be alerted when IT responds to your ticket, a new approval request appears, or other important events happen.
-
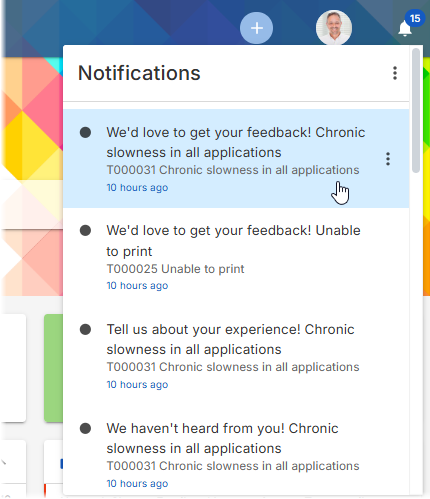
Push notifications
Push notifications (bell notifications) appear in the top-right corner, in the bell icon, and are great for quick updates. Click a notification to go directly to the relevant item.
-
Email notifications
Email notifications arrive in your mailbox and include a description of the change, usually with direct links to the Self Service Portal. Compared to push notifications, they may provide more details. For example, if someone from IT invites you to a TeamViewer support session, the email contains the session link, while the push notification simply reminds you to check your email.
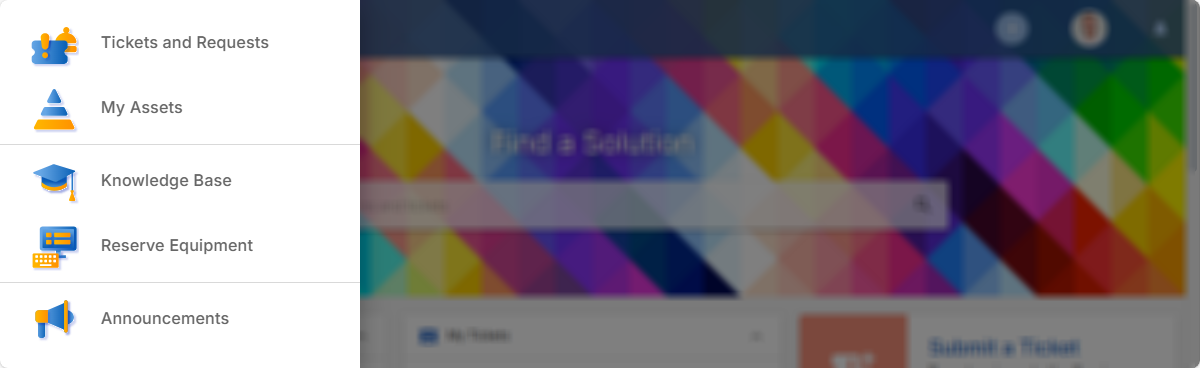
Navigation menu
You can access all areas of the portal from anywhere using the side navigation menu. Just click the three-line menu icon in the top left corner to open it and quickly move around.