Google Analytics Integration
Updated in 2024.2
Google Analytics is a powerful service that helps businesses understand user behavior and engagement on their websites and applications. This article describes how to integrate Google Analytics with Alloy Navigator Express to capture how many users visit your Self Service Portal, understand what activities they complete, and collect other user data. The process involves creating a Google Analytics tracking code and embedding that code to your Self Service Portal instance as a custom JavaScript.
Here are the steps you should take to integrate the Self Service Portal with Google Analytics, first in Google Analytics Admin dashboard, and then in Alloy Navigator Express. All these steps are described in details below.
- Set up Google Analytics for the Self Service Portal
- Create a Google Analytics property.
- Add a data stream for your Self Service Portal instance.
- Obtain a Google tag (or Google Analytics code).
- Embed JavaScript with Google Analytics code to the Self Service Portal
- Create an embeddable JavaScript with your Google Analytics code.
- Embed the JavaScript to the Self Service Portal.
- Restart the Self Service Portal instance to apply the changes.
IMPORTANT: It takes up to 48 hours for data to appear in Google Analytics after embedding the JavaScript.
Set up Google Analytics for the Self Service Portal
NOTE: This article is about a Google Analytics 4 (GA4) property. GA4 is replacing Universal Analytics (Analytics "classic"), which went away in 2023. For instructions on how to migrate to GA4, see [GA4] Make the switch to Google Analytics 4 by Google.
To set up Google Analytics for a Self Service Portal instance:
-
Create a Google Analytics property.
-
If you already have a Google Analytics account, sign in, go to Admin dashboard, click Create Property, and proceed to the next step.
If you do not have a Google Analytics account, create one as follows:
-
Go to the Google Analytics homepage and click Start measuring.
-
Click Create Account. Provide an account name. Configure the data-sharing settings to control which data you share with Google.
-
Click Next to add the first property to the account.
-
-
Enter a name for the property (e.g. "Alloy Self Service Portal") and select the reporting timezone and currency.
If a user visits your Self Service Portal on a Wednesday in their timezone, but it's still Tuesday in your timezone, the visit is recorded as having occurred on Tuesday. If you choose a timezone that observes Daylight Savings Time, Google Analytics automatically adjusts for time changes. If you do not want to adjust for Daylight Savings Time, use Greenwich Mean Time.
-
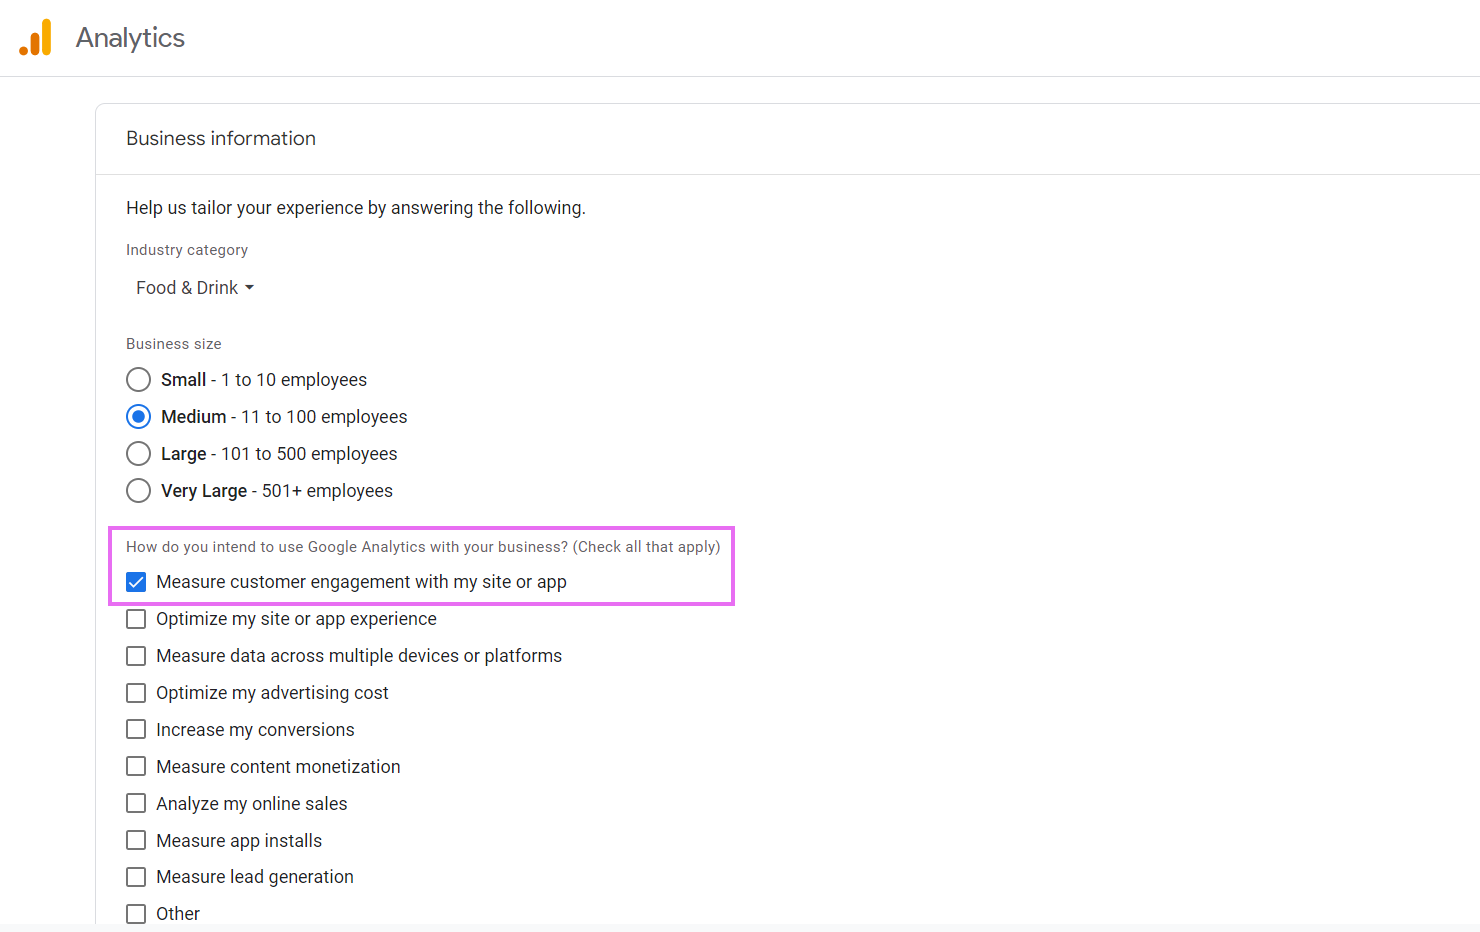
Click Next. Select your industry category and business size.
-
Make sure that you have selected the Measure customer engagement with my site or web item.
-
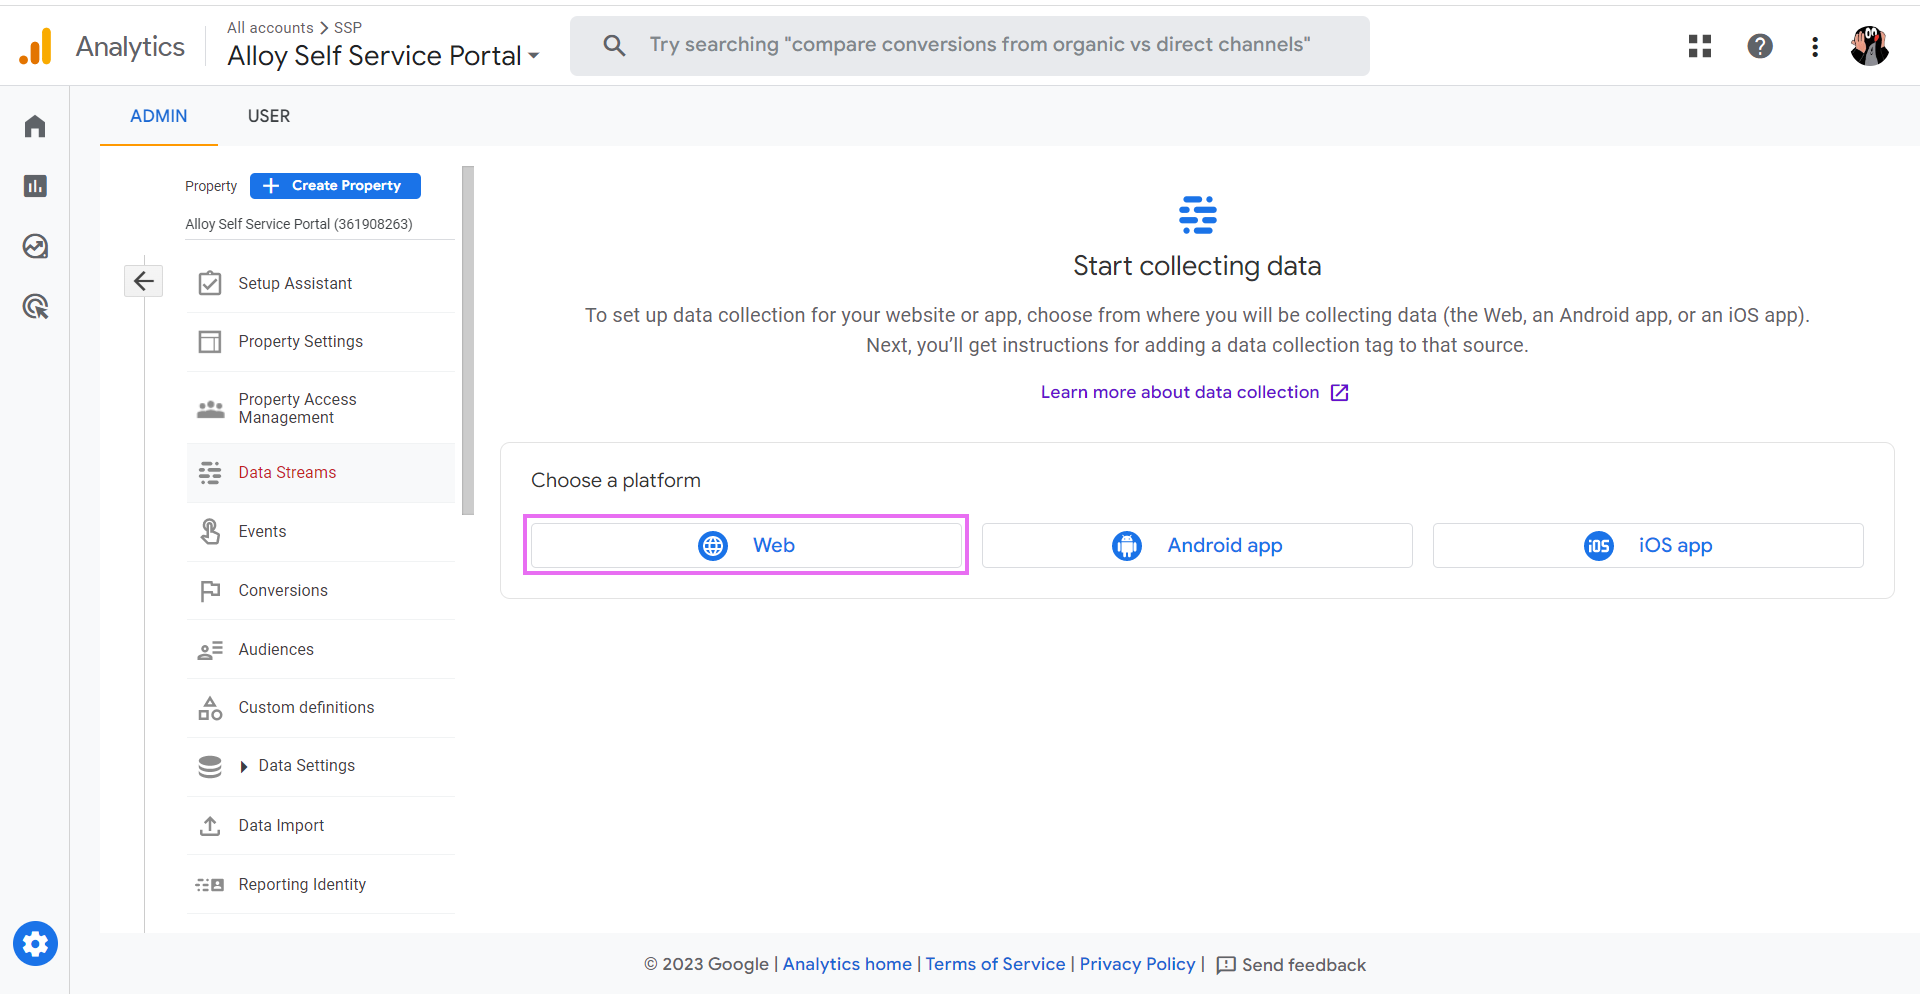
Under Start collecting data, click Web.
-
-
Add a data stream for your Self Service Portal instance.
-
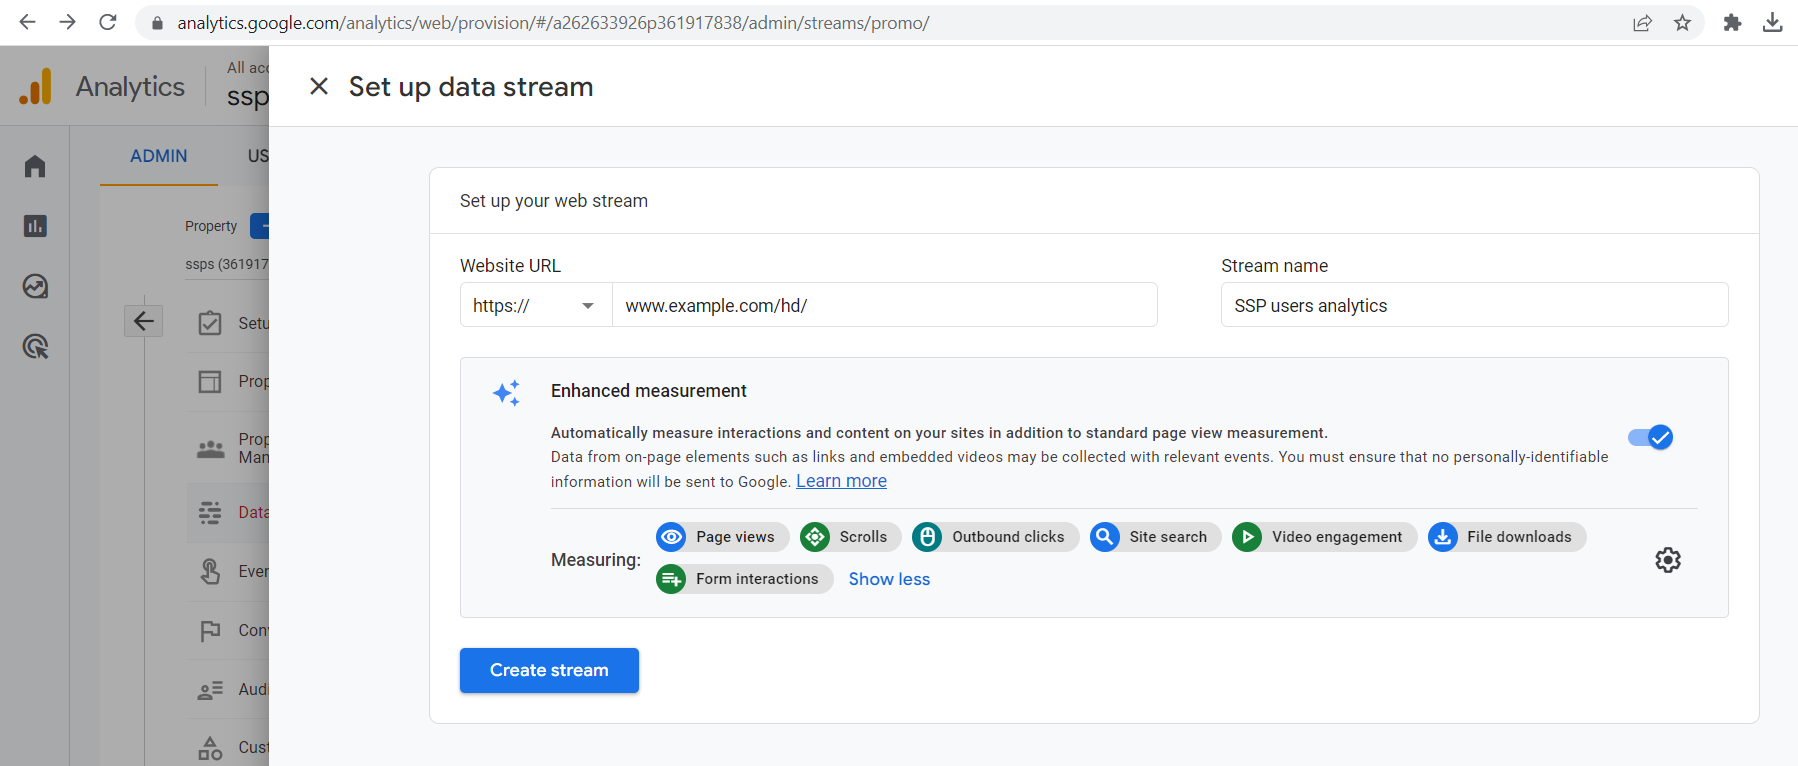
Enter the URL of your Self Service Portal (for example, "https://example.com/hd/"), and a stream name, (for example, "SSP users analytics").
-
Optionally, enable the Enhanced measurement to obtain more data. Once the data stream has been created, you can always go back and individually disable the enhanced measurement events you do not want to collect.
-
Click Create stream.
-
-
Obtain a Google tag (or Google Analytics code).
-
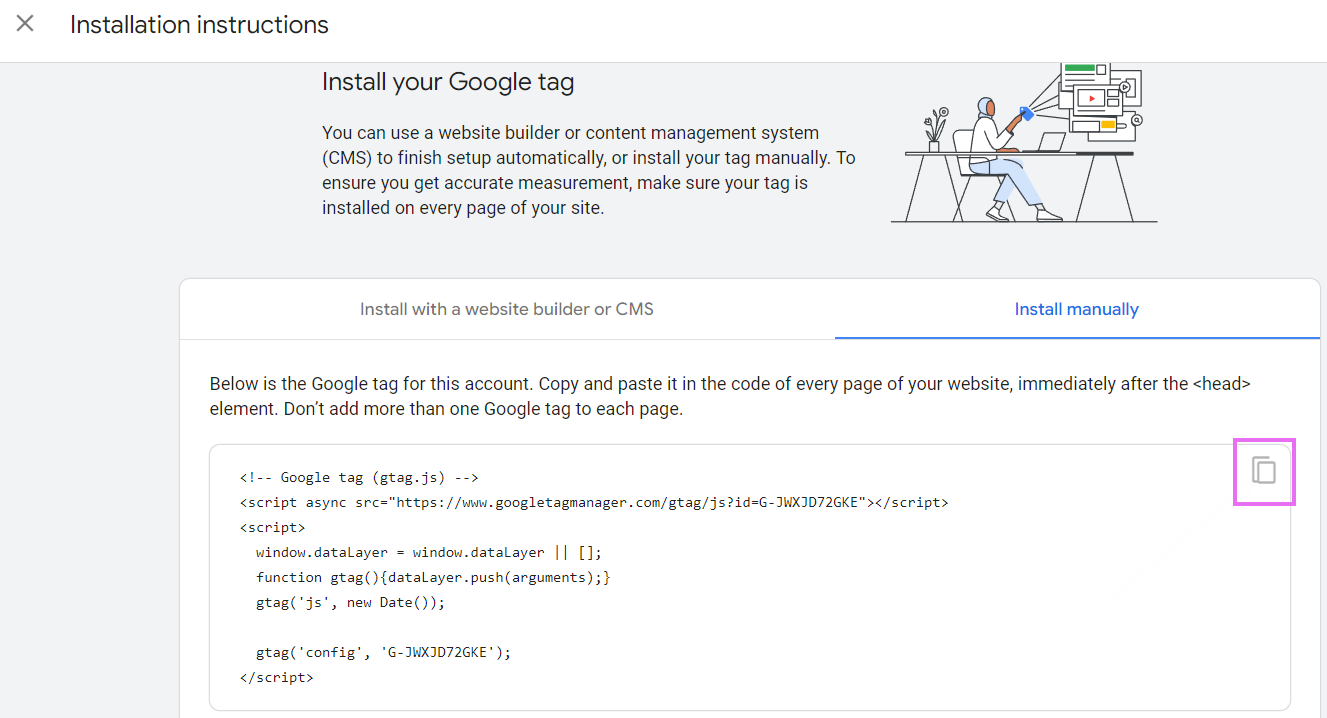
On the Installation instructions page, select Install manually.
-
On the screen, you’ll see the JavaScript snippet for your account's Google tag. Your Google tag is the entire section of code that appears, beginning with:
<!-- Google tag (gtag.js) -->and ending with
</script> -
Copy the Google tag to the Clipboard. You will need it in the next step.
-
Embed JavaScript with Google Analytics code to the Self Service Portal
Now you need to add the Google tag (Google Analytics code) to Self Service Portal pages. We will use the custom JavaScript feature for that. It means that you will create an embeddable JavaScript for running the Google Analytics code and then embed that script to your Self Service Portal instance.
INFO: For details on the custom JavaScript feature, see Administration Guide: Embedding custom JavaScript to the Self Service Portal.
To add the Google tag directly to your web pages:
-
Create an embeddable JavaScript:
-
Open Microsoft Notepad and paste your Google code from the Clipboard.
-
Copy the code below and paste it under your Google code.
var imported = document.createElement('script'); imported.src = '<replace with the src from your Google tag>'; document.head.appendChild(imported); window.dataLayer = window.dataLayer || []; function gtag(){dataLayer.push(arguments);} gtag('js', new Date()); gtag('config', 'replace with your Google tag'); -
Replace the source (
src) and the tag (gtag) in the pasted code with the values from your Google code, as shown below.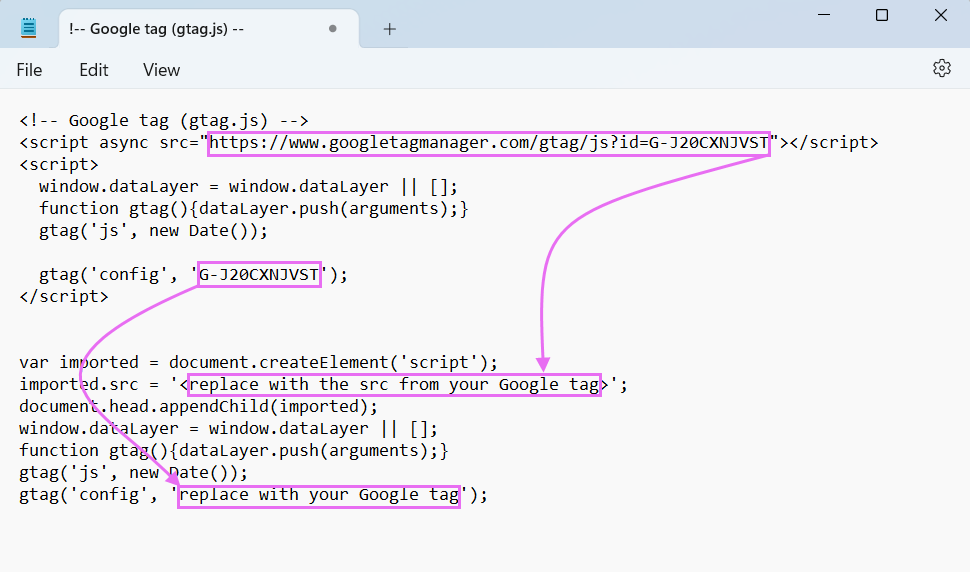
-
Delete the entire first section of your Google code and keep only the last section of your new code, beginning with:
var imported = document.createElement('script');and ending with
gtag('config', 'G-J20CXNJVST');Make sure to paste your unique
gtagvalue. -
Save your new code as a .js file. The file name must start with add_.
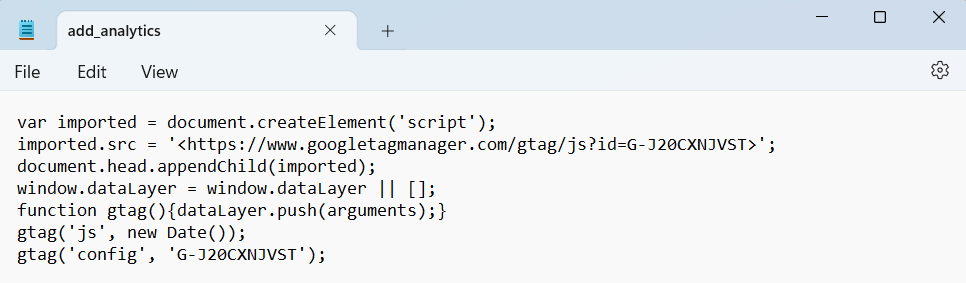
IMPORTANT: Make sure that the file name starts with add_, such as add_analytics.js.
-
-
To embed the JavaScript to the Self Service Portal, place your add_[filename].js file under the folder where your Self Service Portal files are located:
[PhysicalPathToSSP]\remix\client\TIP: You can view the physical path of SSP files using the Web Configuration tool. For details, see Administration Guide: Physical Path to Self Service Portal Files.
-
Restart the Self Service Portal instance to apply the changes.
-
Run the Web Configuration tool.
-
Right-click the Self Service Portal instance and choose Restart Portal from the pop-up menu.
-
Close the Web Configuration tool.
-
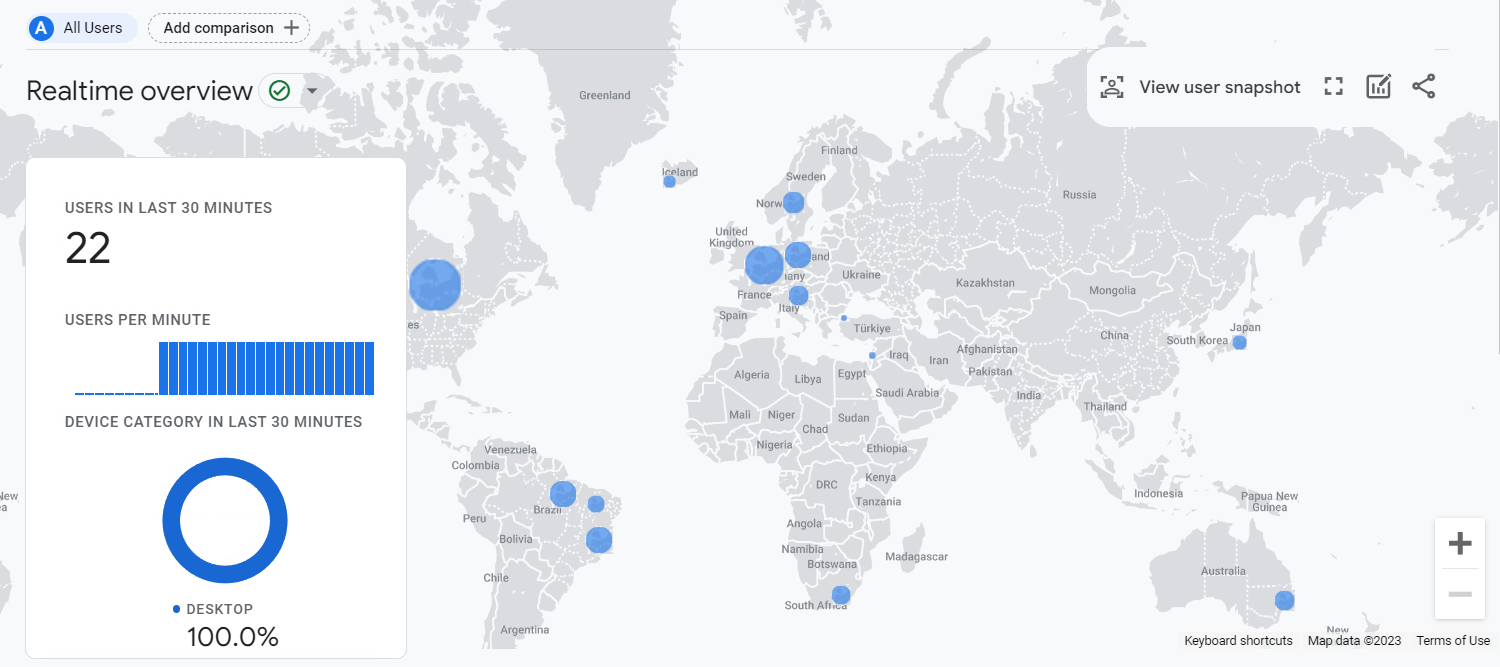
View and analyze collected data
That’s it! Access your analytics through your account at http://www.google.com/analytics and use a rich set of reports and other analysis tools to measure user engagement.
IMPORTANT: Typically, you will begin seeing data in your new Google Analytics 4 property within the next 48 hours after you added the JavaScript. If you embedded the script more than 48 hours ago, make sure that the Google tag is set up correctly.