Creating Ticket Templates
Unlike other objects, Tickets may have parent-child relationship, i.e. Tickets may have child Tickets. To support this, the Settings enables you to create Ticket Templates of three types:
- Regular Templates for creating Tickets — When the technician uses a regular Ticket Template, Alloy Navigator Express creates a single Ticket and assigns initial values to Ticket fields in accordance with the Template definition.
- Templates for creating child Tickets — When the technician uses such a Template, Alloy Navigator Express creates a child Ticket for the current parent Ticket and assigns initial values to child Ticket fields in accordance with the Template definition. Commands for child Ticket Templates are available on the Child Tickets tab of the Ticket details window (see Desktop App commands for creating child Tickets:).
- Templates for creating parent Tickets with child Tickets — Using such a Template creates several Tickets at the same time: a parent Ticket with one or more child Tickets. The Template definition specifies how to assign initial values to both the parent and child Tickets.
Desktop App commands for creating child Tickets:
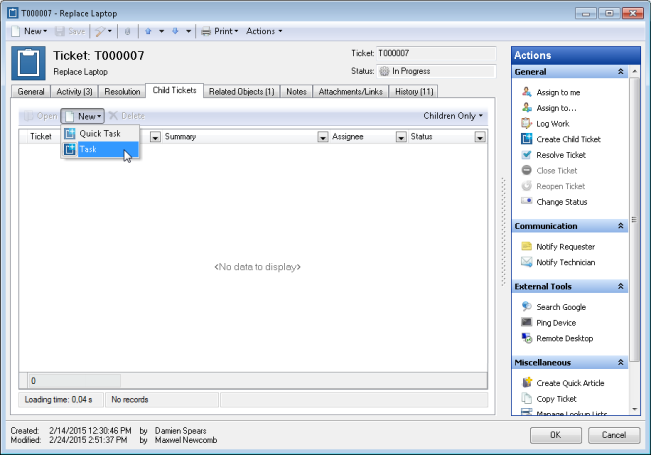
NOTE: Technicians may also create child Tickets using the built-in "Create Child Ticket" workflow Action, which is available in the Action Bar in the Desktop App, Web App, and the Mobile App. For details on customizing built-in Actions, see Customizing Workflow Actions.
To create a Ticket Template, follow the instructions below.
- From the Sidebar, navigate to Customization > Service Desk > Tickets > Workflow > Templates.
- Click New. The Ticket Template dialog box opens.
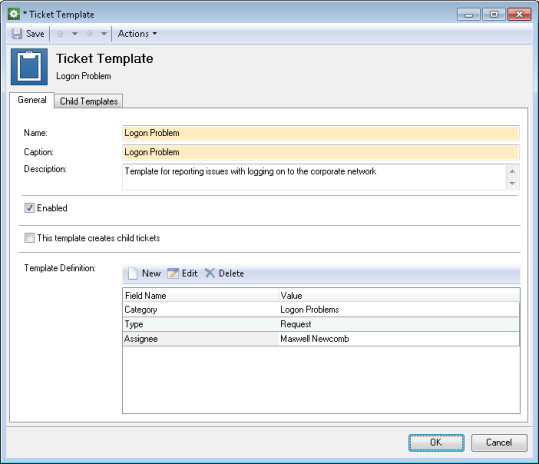
- In the Name field, type the Template name.
- In the Caption field, type the command that will be displayed to the user in the New menu. The Caption field is initialized with the name you entered in the previous step.
- Optional: Enter a description for this Template in the Description field.
NOTE: Keep the Enabled check box selected. Otherwise, this Template will be unavailable to users.
- If you want this Template to create child Tickets, select the This template creates child tickets check box. The command for this Template will be available on the Child Tickets tab of the Ticket details window, as illustrated in Desktop App commands for creating child Tickets:.
- Under Template Definition, specify how this Template will assign initial values to fields of newly created objects:
- Click New. A new row appears.
- Select an object field in the Field Name field and enter its initial value in the Value field.
Repeat these steps to assign values to other fields you want the Template to initialize. If you want to remove a field from the Template, select it and click Delete.
- If you want this Template to create parent Tickets together with one or more child Tickets, specify how many child Tickets will be created and which Ticket Templates will be used to assign initial values to their fields.
NOTE: Make sure that Ticket Templates for child Tickets already exist. Note that those child Templates do not need to have the This template creates child tickets check box selected.
- Click the Child Templates tab and then click Add. The Select Template dialog box appears.
- Double-click a Ticket Template for creating child Tickets.
Each child Template creates one child Ticket. Repeat these steps to add more child Templates. If you want to remove a Template from the list, select it and click Remove.
- When done, click OK.