Administration Guide
Creating Routing Policies
To create a new Routing policy for a Ticket or Change Request, follow the instructions below.
INFO: For information on Business Policies, see Business Policies.
- From the Sidebar, navigate to Customization > Service Desk > Objects > Workflow > Business Policies.
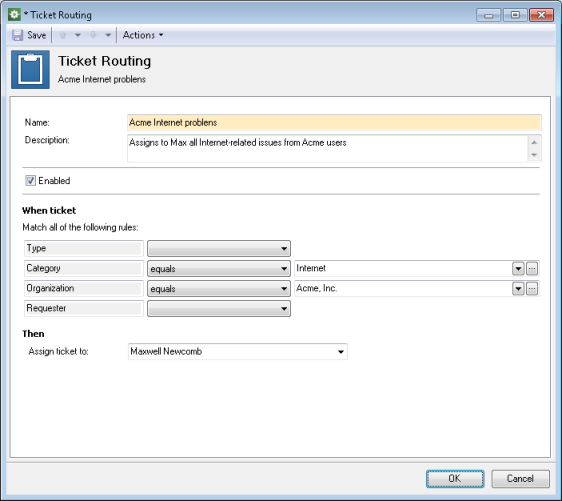
- Click New > Routing. The Object Routing dialog box opens.
- In the Name field, type the policy name.
- Optional: Enter a description in the Description field.
NOTE: Keep the Enabled check box selected. Otherwise, this policy will not fire.
- Under When ticket, specify your conditions for assigning Tickets or Change Requests to a particular technician.
You can add one condition for each of the following Object fields: Type, Category, Organization, and Requester. In each row, select an operator and then select another value to compare with the field’s value, if the operator requires. The Workflow Automation Engine applies the policy when all conditions are true.
NOTE: If you do not specify any conditions, Alloy Navigator Express will re-assign a Ticket or Change Request whenever it is modified.
- Under Then, select an assignee from the list of active Person records that are marked as technicians.
- Click OK.