How to customize auto-prioritization rules
You can customize auto-prioritization rules, independently for each Service. When a Ticket is created or modified, Alloy Navigator will analyze the Ticket’s Service and Requester attributes and determine the established Service Level for the corresponding service.
To customize auto-prioritization rules, follow the steps below. This can be done in the Desktop App, or in the Web App.
- From the Sidebar, navigate to Service Management > Services.
- Double-click a Service. The Service dialog box opens.
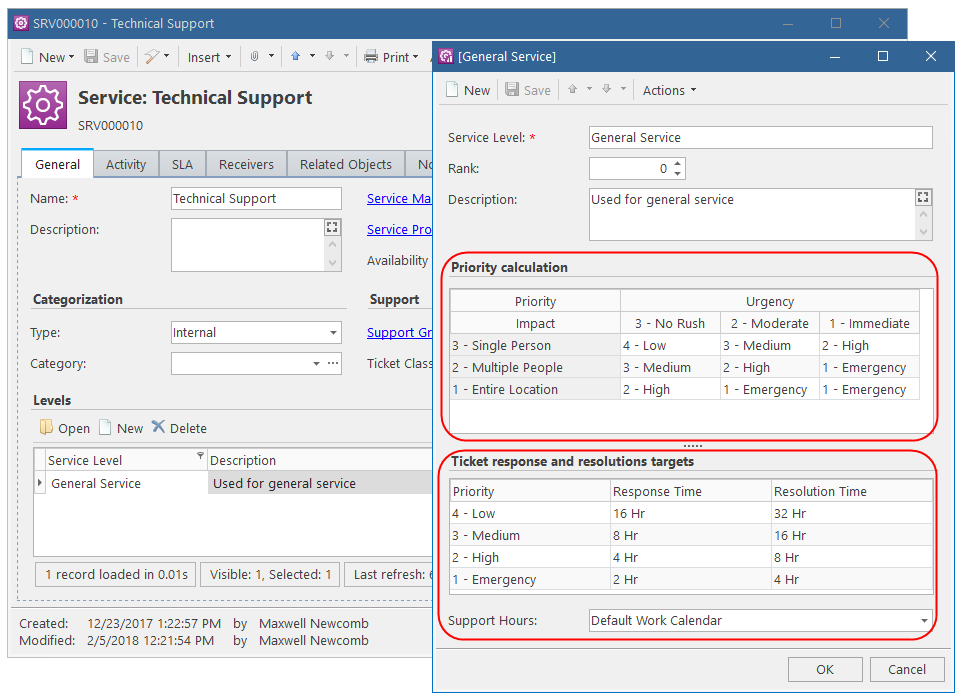
- Under Levels, double-click the Service Level you want to customize. The Service Level dialog box opens.
- The following parameters define how the Priority, Response Date, and Due Date for this Service Levels are calculated:
- Rank— the Service Level rank, which determines its position in the Service Level drop-down list in the SLA details dialog box.
- Priority Calculation — the matrix of Priority levels for every combination of Urgency and Impact values.
- Ticket Response and Resolutions Targets — the matrix of Response Time and Resolution Time values for every Priority. Alloy Navigator uses these values for calculating Tickets’ Response Date and Due Date.
- Support Hours— the work calendar to use for calculating work hours.
INFO: For details, see Administration Guide: Setting Up Work Calendars, Using Personal Work Calendars.
- Specify all parameters as needed then click OK to save your changes.
NOTE: The Urgency, Impact, and Priority classifications may differ for each class of Tickets. Make sure to specify auto-calculation rules for each Service Level of your Services. Priority, Response Date, and Due Date for tickets will not be calculated if the associated Service Level has not auto-calculation rules.