How to set up custom one-click workflows via the API
Introduced in 8.6
Updated in 2024.2
This article explains how to build a custom one-click workflow, step by step. These workflows let users trigger actions by clicking a hyperlink in an email or on a web page—no forms, no sign-in.
NOTE: Alloy Navigator includes several ready-to-use one-click workflows. To learn how to enable them, see How to set up one-click workflows via the API.
One-click workflow mechanism at a glance
To set up a custom one-click workflow, complete these steps:
-
Make sure that the Alloy Navigator API module is set up. See API module and API URL.
-
In the Settings App, create at least two workflow items:
-
A workflow Action for collecting the user input. See Collecting user input.
-
A workflow Action for processing the collected input. See Processing user input.
-
-
Optional: Customize the web page that tells your customers that their feedback has been received. See Customizing the Success and Error web pages.
API module and API URL
One-click workflows send user input through the API, so it’s essential to have the API properly installed and configured in your environment. The API module must be set up with Access Token user authentication enabled.
-
Cloud customers: The API module is pre-installed and ready to use
-
On-premises customers: You need to install and configure the API module. For instructions, see Installation Guide: Installing and Configuring the API Module
To find your API URL, open the web-based Admin Center and navigate to Apps and Portals > API > General. The URL field shows your API endpoint, which typically looks like this:
https://mycompany.com/alloynavigator/apiThis URL is available via the system macro %[SYS API Link]% and can be used in your workflows.
Collecting user input
To collect user input, you need a workflow Action. For example, you can create an Action that generates Email Notifications prompting the user to click one of the available embedded options, and captures the user input as parameter values. The Action will also get the ID of the person receiving the email and the ID of the target object.
NOTE: The Person record must exist and be active. A matching Alloy Navigator account is not required.
Generation of API links
To transfer the user input to Alloy Navigator, it must be converted to a specific URL for the API module. The conversion is performed by a special database function: dbo.GenerateActionURLParams.
The function requires the following information:
dbo.GenerateActionURLParams (@ApiURL, @ActionID, @PersonID, @ObjectID, @ExpirationDate, @ActionParams, @SuccessMessage)| Attribute | Description | Example | Data type |
|---|---|---|---|
@ApiURL
|
The URL of Alloy Navigator API's endpoint. It is convenient to use the "API Link" system macro. For details, see API module and API URL. |
|
nvarchar(max) |
|
|
The ID of the Action to feed the user input to. To get the user input sent via the API, we recommend using action's virtual fields. For details, see Processing user input. |
|
nvarchar(max) |
|
|
The ID (globally unique identifier, GUID) of the Person record for the person who receives the notification and clicks the link. The Person record must exist and be active. Note that a matching Alloy Navigator account is not required. |
|
nvarchar(max) |
|
|
The ID (globally unique identifier, GUID) of the object to be updated with the action identified by |
|
nvarchar(max) |
@ExpirationDate
|
The date after which the link expires. NOTE: Clicking an expired link will produce the "Link has expired" error message. |
|
datetime |
@ActionParams
|
A string composed of a series of field-value pairs separated with the ampersand character (&). The string includes fields required by the Action For details, see Processing user input. |
An action with a single parameter (a single virtual field): An action with multiple parameters (multiple virtual fields): An action with no parameters (no virtual fields): |
nvarchar(max) |
@SuccessMessage
|
The message to show to the user after the action completes successfully. |
An action with a message: A "silent" action: |
nvarchar(max) |
NOTE: The URL parameters that users will see in the address bar of their web browser will be encrypted.
Example: Collect customer feedback
For example, you can set up a one-click customer satisfaction survey for Self Service Portal customers:
- Once
- The customer clicks on the desired option embedded in the message.
- A numeric score appears in the Rating field of the corresponding Ticket.
See how a sample Incident Step Action can collect user feedback:
-
The Action gets the Person ID of the email recipient.

In this example, the Action simply asks the user to select a person from the drop-down list on the Action Form.
-
The Action triggers sending Email Notifications.
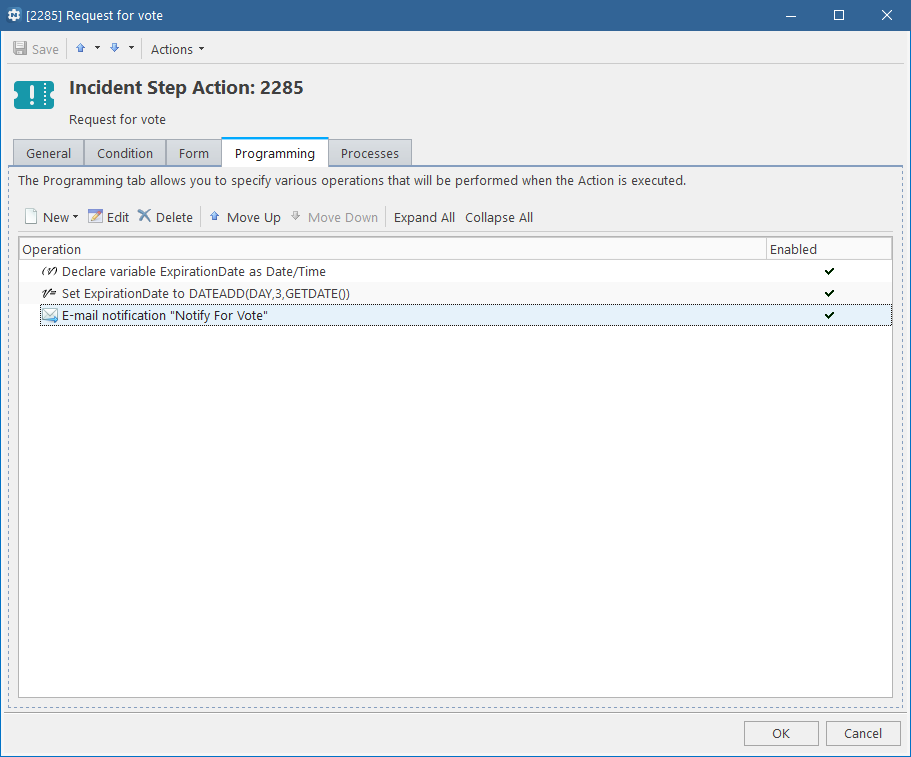
This Action uses the Email Notification operation to generate email messages.
-
The Email Notification asks the user to click one of the available options.
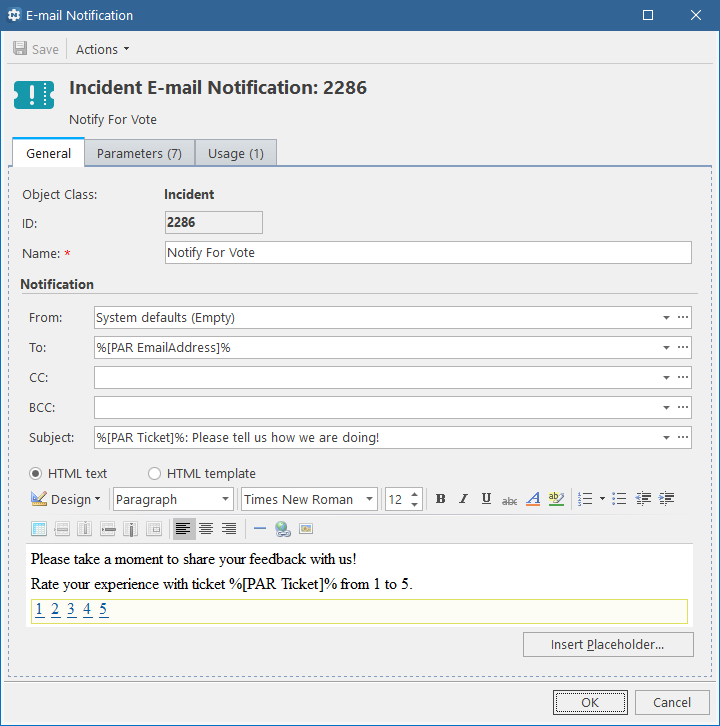
This Email Notification generates messages with this HTML content:
<p>Please take a moment to share your feedback with us!</p> <p>Rate your experience with ticket %[PAR Ticket]% from 1 to 5.</p> <p> <a href="%[PAR VoteUrl_1]%">1</a> <a href="%[PAR VoteUrl_2]%">2</a> <a href="%[PAR VoteUrl_3]%">3</a> <a href="%[PAR VoteUrl_4]%">4</a> <a href="%[PAR VoteUrl_5]%">5</a> </p>Note that clicking a link in the message body opens a URL containing the user feedback. That URL is generated by a SQL expression, as explained below.
-
The Email Notification captures the user input as parameter values.
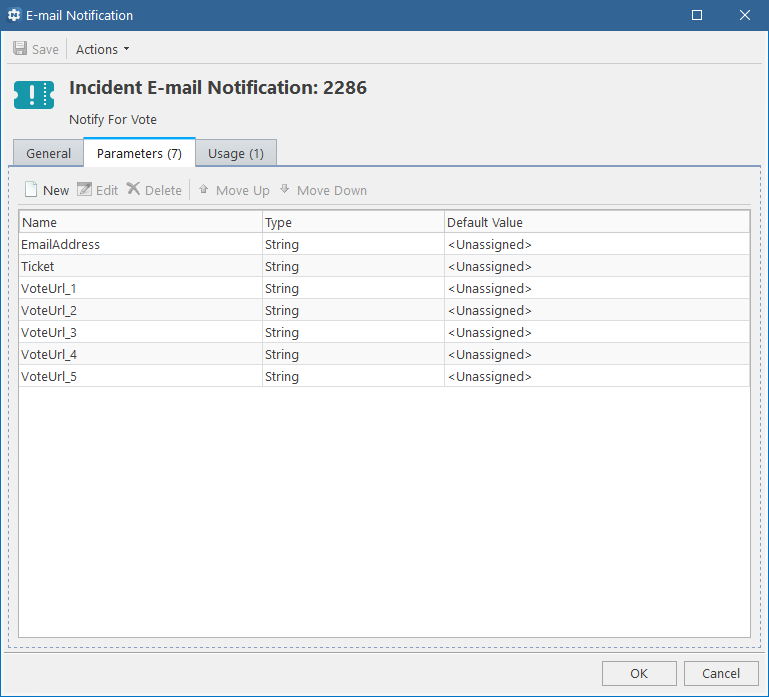
This Email Notification have parameters where the email address and the user's vote will be captured.
-
The Action processes the supplied parameters.

This Action assigns values to the Email Notification parameters. Go to the next step to view how each of the available user's votes is converted to a specific URL for the API module.
-
The SQL expression converts the user input to a specific URL.
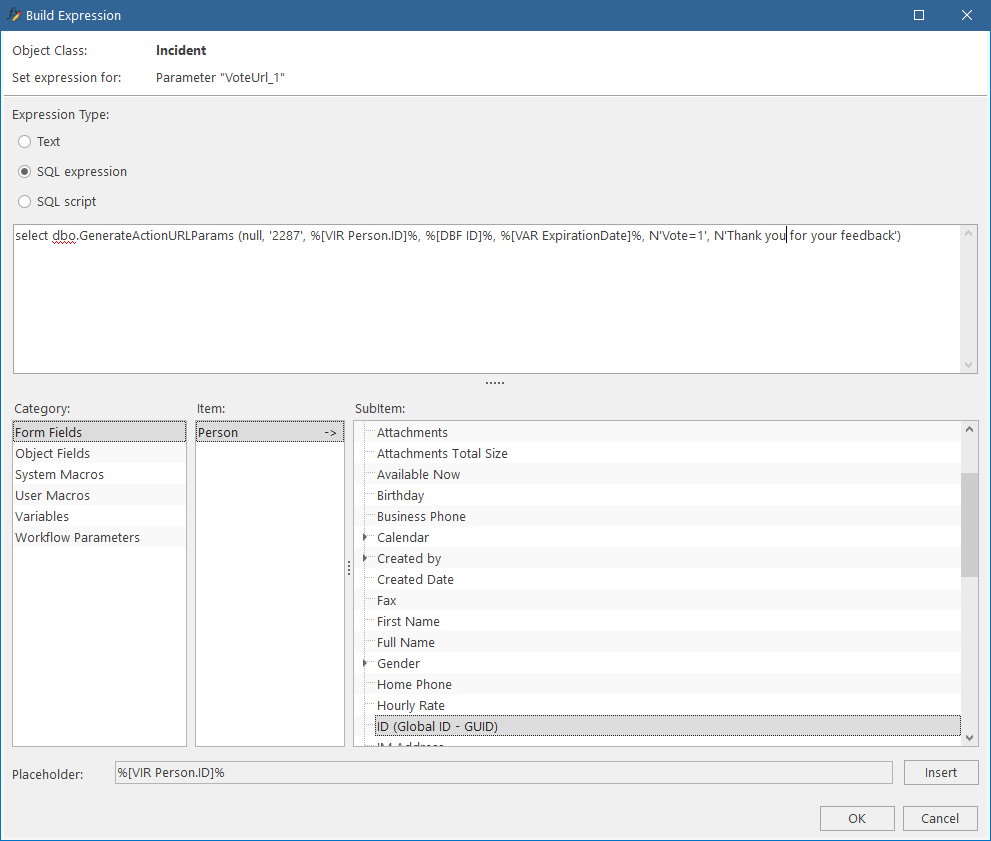
To generate a specific API link, the
dbo.GenerateActionURLParamsfunction is used.For example, this SQL expression converts the highest rating parameter
%[PAR VoteUrl_5]%to the URL for the API module:select dbo.GenerateActionURLParams (%[SYS API Link]%, '2287', %[VIR Person.ID]%, %[DBF ID]%, DATEADD(DAY,3,GETDATE()), N'Vote=5', N'Thank you for your feedback')INFO: For details, see Generation of API links.
Now everything is ready to capture user input. Let's configure how to process it.
Processing user input
To process the collected user input, you need another workflow Action. That Action will be called via the API when the user clicks the desired option. We recommend to use virtual fields to get the user input sent via the API.
Example: Calculate Incident rating
Let's see how an Incident Step Action processes the user feedback collected by the "Request for Vote" Action from our example above.
-
The Action gets the user input in the form of parameters sent via the API.
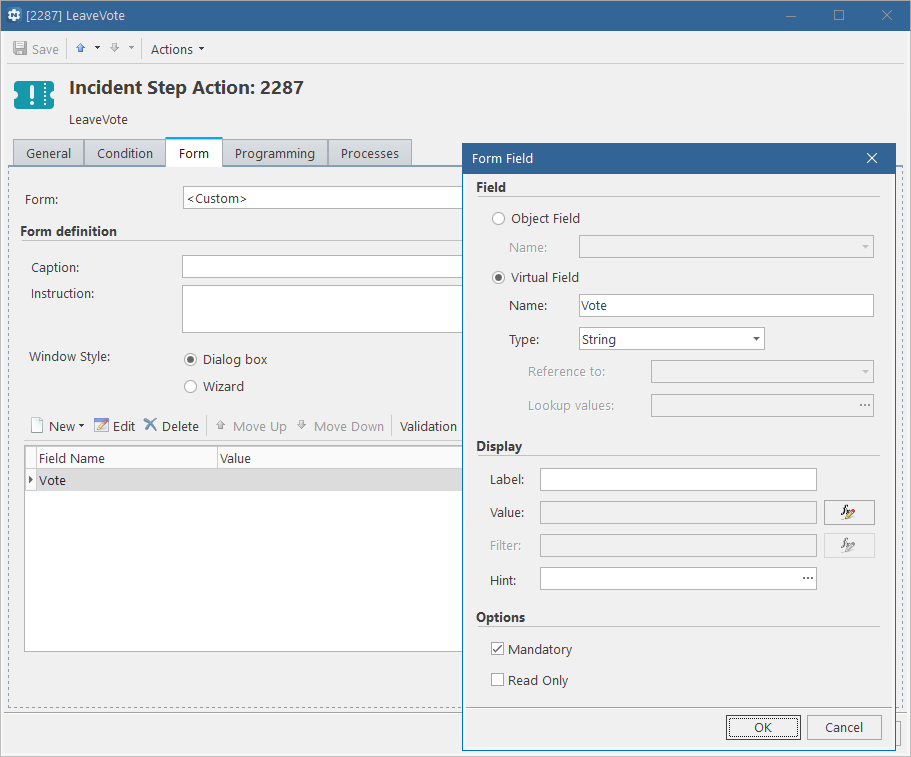
The virtual field on the Action Form gets the user's vote, transferred via the API.
-
The Action checks the condition.
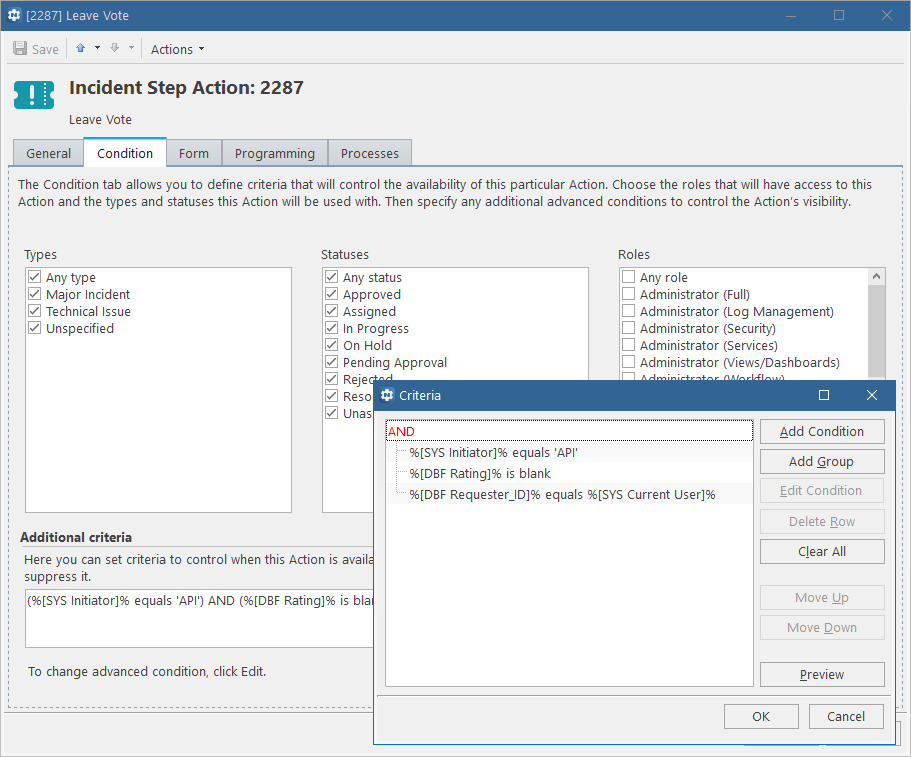
The workflow engine checks whether all these conditions are met:
- The action is initiated via the API;
- The current user is the Incident requester;
-
The Incident requester has not already voted.
-
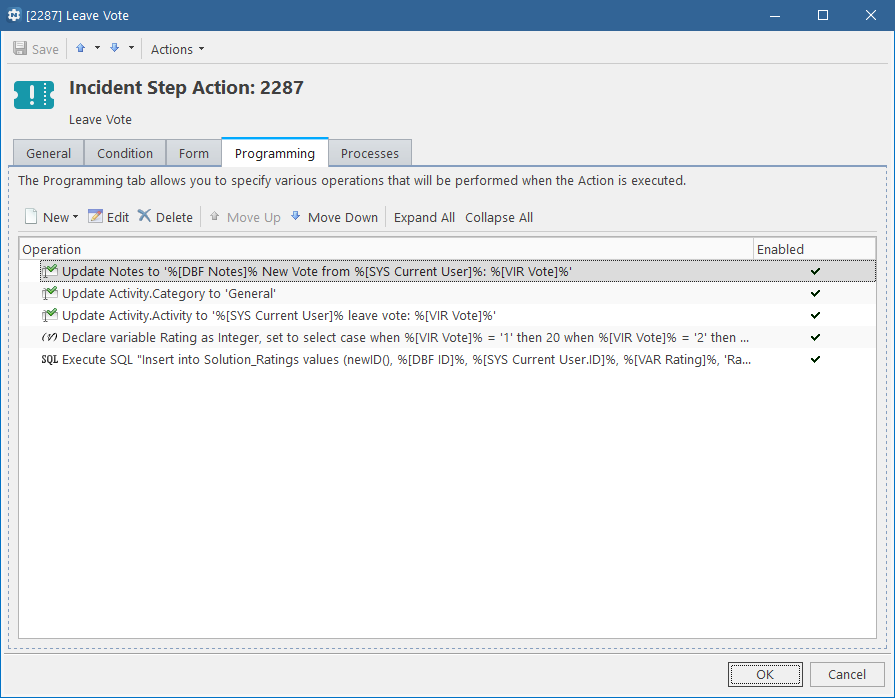
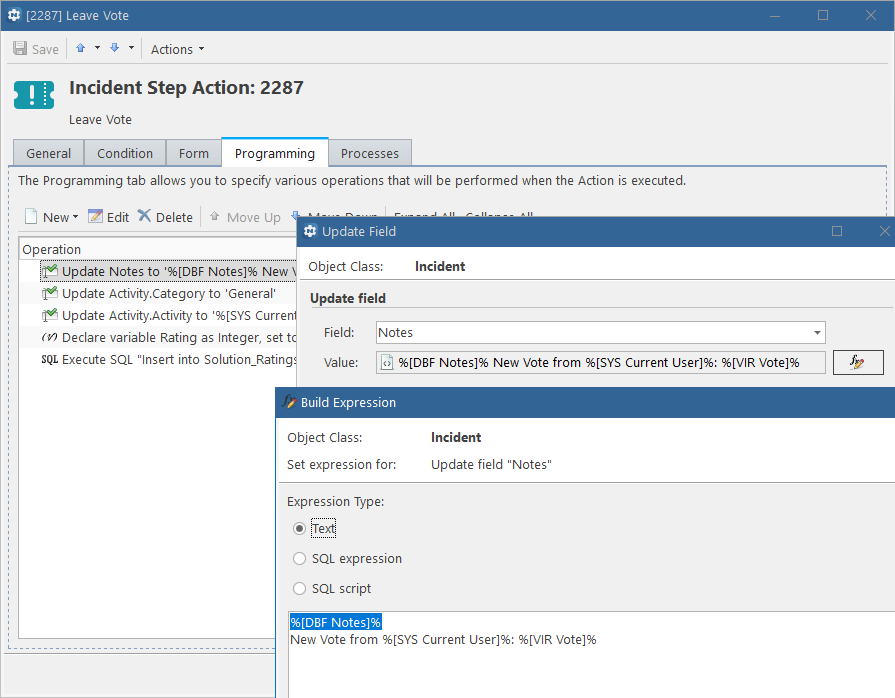
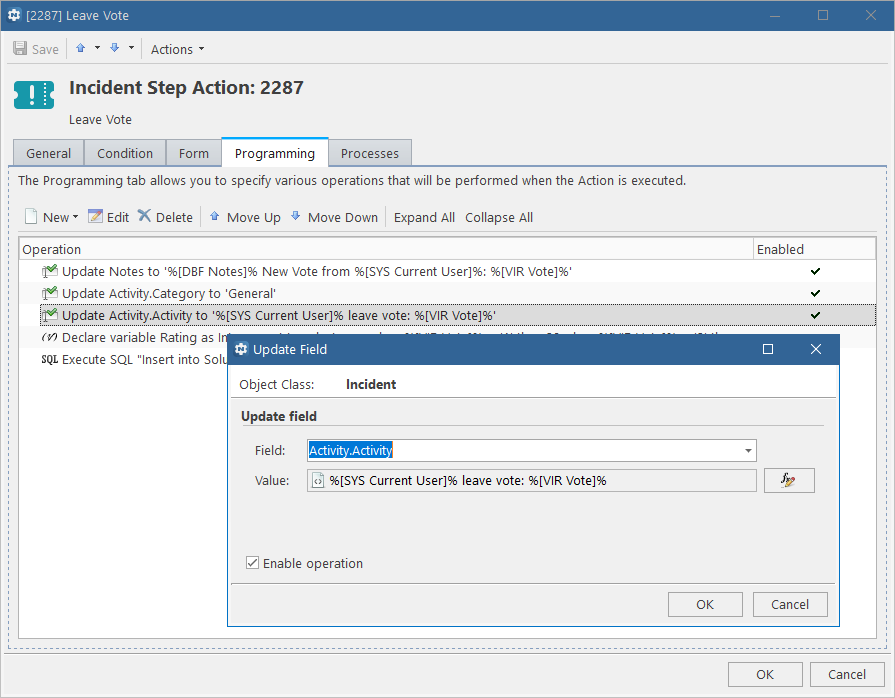
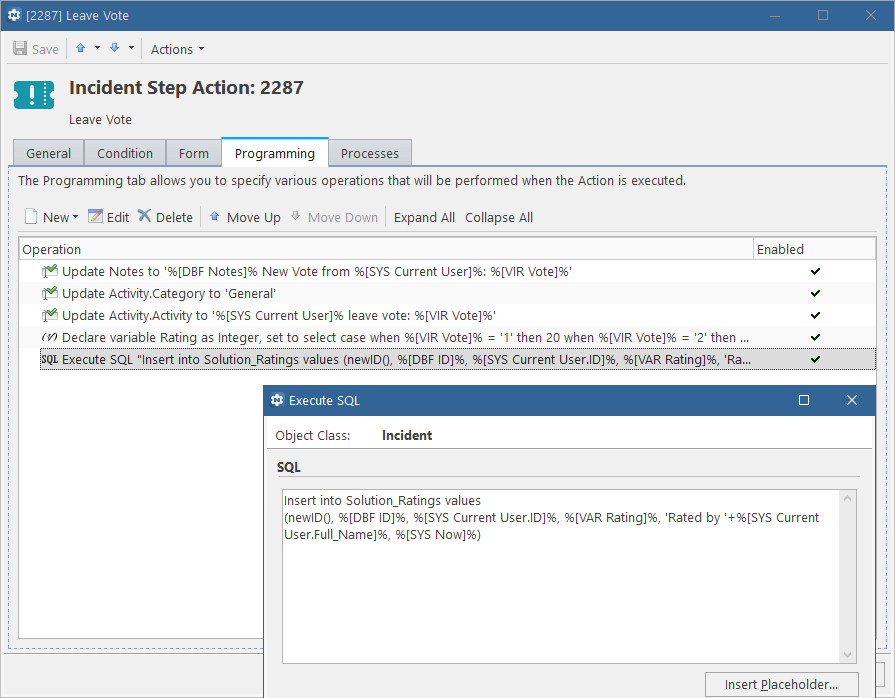
The Action processes the parameter value and calculates a numeric rating score for the Incident.
-
This sample Action adds the voting details to the Incident's Notes tab,
-
adds a new log record to the Activity Log,
-
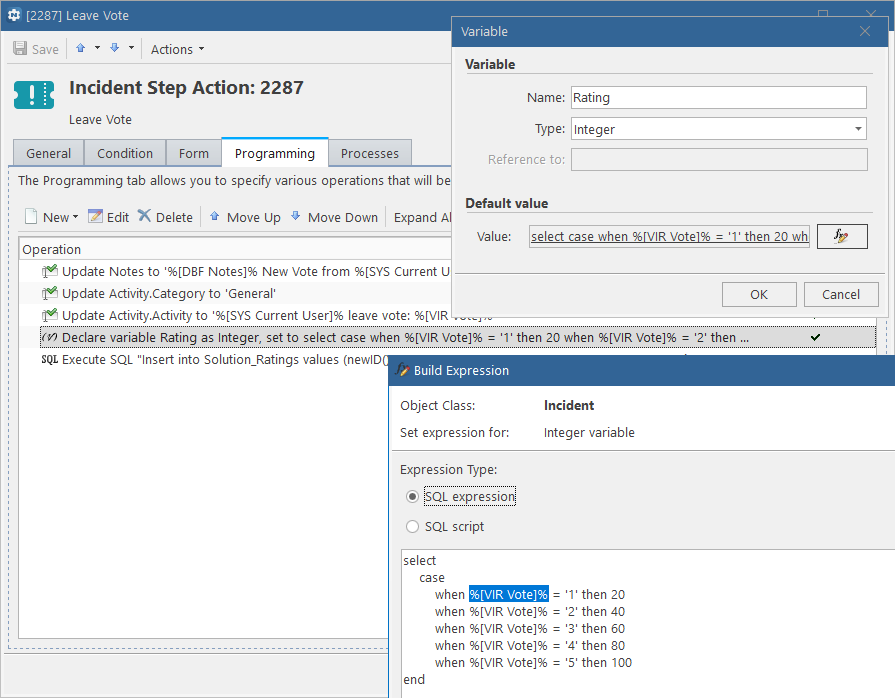
declares a variable to convert ratings to the percentage,
-
and finally, calculates the Incident rating based on the user's vote.
-