How to control user access to IT-managed content in the Self Service Portal
Alloy Navigator allows you to decide which users can see different types of content and services in the Self Service Portal. This is helpful when different information and services are meant for different audiences. For example, Finance may need access to services and updates that support their daily work, while HR may have resources designed specifically for them.
In the Self Service Portal, there are two types of content:
-
IT-managed content created and published by the IT team, such as Service Catalog items, Knowledge Base articles and announcements.
-
User-submitted content created by portal users themselves, such as tickets and service requests.
This article explains how to control access to IT-managed content at three levels:
-
for an entire department or other organization (Organization),
-
for a group of employees (Group),
-
for an individual user (Person).
NOTE: To learn about controlling access to user-submitted content, see Help: Change a user’s access level.
Step-by-step process
To control access to IT-managed content and services in the Self Service Portal:
-
In the Alloy Navigator Web App, navigate to Service Management > Servicesand create a service that will represent the audience-scoped access, for example, HR Announcements.
-
In Service Management > SLA, create a new SLA.
-
In the Service field of the new SLA settings, select the service you just created.
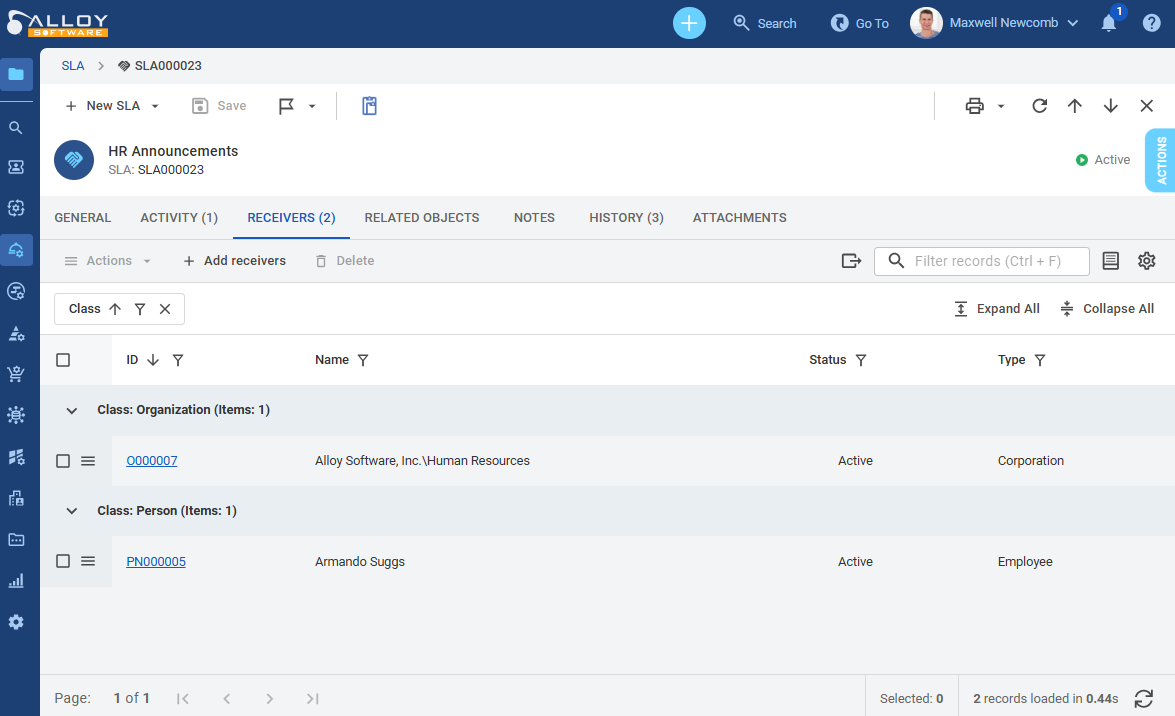
-
In the Receivers tab of the SLA, click + Add receivers. Here you decide who should have access to the service. You can choose one or more of the following options:
-
Add Organization: Select a company, vendor, or department. If you want to limit access to a specific department (such as Finance or HR), this is the option you’ll use.
-
Add Group: Assign the SLA to a group of employees, such as the Network Team or Service Desk.
-
Add Person: Assign the SLA to an individual user.
-
-
-
Return to the newly created service and open the SLA tab. The SLA you just created already appears in the available list of options. Select this SLA to associate it with the service.
-
Open the IT-managed item that you want to control access to. It can be a Service Catalog item, a Knowledge Base article or an announcement. Then, in the item’s settings, select the newly created service from the Service drop-down list.
NOTE: Only one service can be selected per item. If you leave the Service field blank, the item will be visible to all users in the Self Service Portal, regardless of their department, group, or role.
Watch this video to see how the Service Catalog works when it is configured based on user roles: