Managing your account
This page describes how to manage your personal account settings in AlloyScan.
Your account settings allow you to update your personal information, manage your password, adjust how dates and times are displayed in AlloyScan, and control the appearance of the interface.
To access your account settings, click your avatar in the upper-right corner of the screen and select Manage your account.
This opens the Your account page in a new browser tab. The page consists of two sections:
-
General: This section displays your basic profile details and account-related options. This is where you can update your name, add a phone number, view your verified email address, reset your password, and change your avatar.
-
Settings: This section lets you customize how dates and times are displayed across your AlloyScan interface.
Edit your profile
In the General section, you can view and edit the following details:
-
Name: Your display name.
-
Email: Your email address.
-
Phone: Your phone number (optional).
To update your avatar, click ![]() next to your current avatar. This opens the Change avatar dialog, where you can upload a new image by dragging and dropping a file. Alternatively, click the upload area to browse for a file.
next to your current avatar. This opens the Change avatar dialog, where you can upload a new image by dragging and dropping a file. Alternatively, click the upload area to browse for a file.
Supported formats are: PNG, JPG, JPEG, WebP.
The avatar is displayed at 30 pixels wide. Larger images will be scaled down proportionally to maintain the aspect ratio.
Reset your password
In the General section, you can also change your password by proceeding as follows:
-
Click Change password.
-
Enter your current password in the Old password field.
-
Enter your new password and confirm it by typing it again in the Confirm password field.
Make sure your new password meets the following requirements:
-
Must be 8 to 20 characters long
-
Must include at least one uppercase letter and one lowercase letter
-
Must contain at least one digit (0–9)
-
Must include at least one special character (e.g., !, @, #, $, %, ^, &, *)
-
Cannot contain spaces, your user name, or your email address.
Set date and time formats
AlloyScan automatically applies regional formats for dates, times, and numbers based on your browser’s locale. This means dates and times will already appear in a familiar format without any manual setup.
If you prefer a more compact or custom view, go to the Settings section under Your account and adjust the display options:
-
Date format options
-
2-digit year: Display only the last two digits of the year (e.g., 24 instead of 2024)
-
Abbreviate month: Show months as three-letter abbreviations (e.g., Jan instead of January)
-
-
Time format options
-
Display seconds: Include seconds in the time display
-
24-hour format: Use 24-hour time (e.g., 16:30 instead of 4:30 PM)
-
For example, enabling all options would display a timestamp like Jan 3, 24, 21:49:17.
Click Save after making any changes.
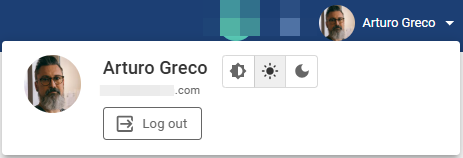
Set the AlloyScan appearance
You can control how the AlloyScan interface looks by selecting one of the following options:
-
System: Follows the appearance settings of your device or browser (Light or Dark).
-
Light: Uses a light color scheme regardless of your system settings.
-
Dark: Uses a dark color scheme that can reduce eye strain and improve visibility in low-light environments.
To change the appearance:
-
Click your avatar in the upper-right corner of the screen.
-
Use the appearance icons to select the required option.
Your selection takes effect immediately and is stored as part of your personal settings. The same appearance will be applied when you use the Admin Center.