Receiving Portable Audit Results
After running the Portable Audit and collecting audit snapshots, you must transport the flash drive (or any other media you used) with audit results to a computer hosting
- Select Audit > Import Snapshots from Media from the main menu. The Import Snapshots from Media Wizard starts.
- On the Welcome page, click Next.
IMPORTANT: The wizard checks if the Automation Server is running. If your server is not started, the wizard will give you a warning. In this case, configure the Automation Server first and restart the wizard.
- On the Select Snapshots page, click Select and browse to and select the audit snapshot files (.adt files) to import and click Next.
- On the Ready to Import page, review the specified settings and click Next to start the import.
- On the Import Completed page, click Finish to exit the wizard. A new "Check" task appears in the Task List. When the task is finished, the newly received audit data appears in the corresponding Site.
NOTE: After audit snapshot is uploaded to the database, the Changes message appears in the status bar. Click this message to refresh the data display.
Importing Snapshots into a Specific Portable Audit Source
You can import snapshots into a specific Portable Audit Source as follows:
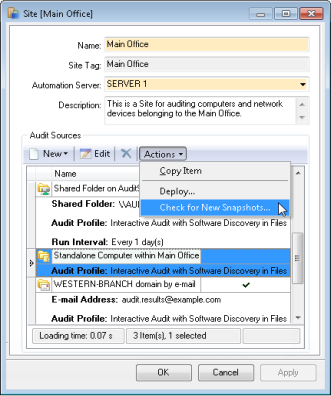
- In the Sidebar, right-click the Site containing the Audit Source and select Properties from the pop-up menu. The Site [Site Name] dialog box opens.
- Select your Portable Audit Source and click Actions > Check for New Snapshots from the Module Menu. The Import Snapshots from Media Wizard starts.
- On the Welcome page, click Next.
- On the Select Snapshots page, click Select and browse to and select the audit snapshot files (.adt files) to import and click Next.
- On the Ready to Import page, review the specified settings and click Next to start the import.
- On the Import Completed page, click Finish to exit the wizard. A new "Check" task appears in the Task List. When the task finishes, the Site will be updated with newly received audit data.
NOTE: After audit snapshot is uploaded to the database, the Changes message appears in the status bar. Click this message to refresh the data display.