Dell Warranty integration
Introduced in 2025
The Dell Warranty integration automatically populates asset records for Dell devices with key warranty information. This ensures your asset data stays accurate and current, reducing manual data entry and helping you make informed decisions throughout the hardware lifecycle.
How Dell Warranty integration works
The Dell Warranty integration runs automatically as a scheduled task. It connects to Dell’s warranty service and updates your asset records with the latest warranty information as follows:
-
Finds Dell assets in Alloy Navigator Express based on your specified list of manufacturers.
-
Uses each device’s Serial Number to query Dell’s API and retrieve the Purchase Date and Warranty Expiration date.
-
Updates these dates in the corresponding
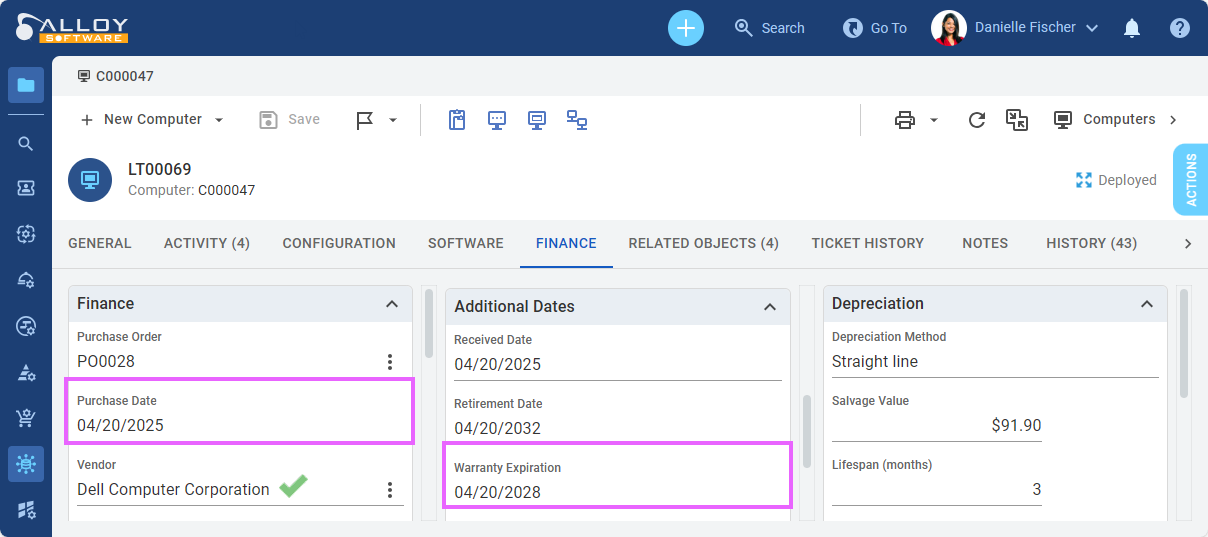
What does Warranty integration include
The integration consists of the following workflow items and components:
-
Workflow parameters for quick customization
-
Workflow scheduled task "Dell Warranty" #
How to enable Dell Warranty integration
Initially, the Dell Warranty integration is disabled. To enable it, follow these steps:
-
First, obtain your API credentials from Dell: a Client ID and API Secret. These credentials authorize Alloy Navigator Express to connect securely to Dell’s services and request warranty data.
-
Once you have the required credentials, configure the integration in Alloy Navigator Express.
-
Customize workflow settings under Workflow Configuration > Integrations > Dell Warranty.
-
Test the integration in Safe Mode to simulate the update process without applying any changes to your data.
-
Activate the automation by enabling the scheduled task under Services and Integrations > Scheduled Tasks.
-
Each of these steps is described in detail in the sections below.
Prerequisites: Obtain API credentials from Dell
Before you configure the integration, request access to the Dell API.
-
Go to the Dell API Portal and sign in with your Dell business account or register if you don’t already have one.
-
Open the TechDirect dashboard and go to the API section.
-
Locate the option to manage existing keys or request new ones.
-
Choose to request new credentials and fill out the submission form provided. After you submit the form, your request will be processed, and the system will generate the required API credentials.
-
Copy the Client ID and Client Secret, then proceed to configure the integration in Alloy Navigator Express.
Configure Dell integration in Alloy Navigator Express
With your Client ID and Secret ready, configure the integration in Alloy Navigator Express. This can be done using either the web Admin Center or the desktop Settings App, whichever you prefer.
Customize workflow configuration
Now you need to synchronize your organization’s Dell account with Alloy Navigator Express and specify the list of Dell manufacturers.
-
In the Admin Center or Settings, navigate to
-
Complete the following details:
-
Manufacturers (required): The list of all manufacturer names exactly as they appear in your Brands table. Enter each name on a separate line. Only exact matches will be used to identify Dell assets.
-
Dell API Client ID (required): The Client ID obtained from Dell.
-
API Secret (required): The API Secret obtained from Dell.
-
Debug (optional): Enables detailed logging for troubleshooting. Do not enable unless needed.
-
Safe Mode (optional): When enabled, runs the integration in test mode, without modifying your records. Use it to safely test the integration.
-
-
Click Save.
Test in Safe Mode
We recommend that you first test the integration in the safe mode, without creating any records.
-
In the Admin Center or Settings, under
-
Navigate to Services and Integrations > Scheduled Tasks. In the Settings App, the section name is Services > Scheduled Tasks.
-
Locate the task named Dell Warranty.
-
Select the task and click Run Now at the top.
-
After the task succeeds, view the statistics to confirm it ran as expected.
-
In the Settings App, the session log is available right in the Scheduled Task window, on the Sessions tab.
-
In the Admin Center, go to Services and Integrations > Scheduled Tasks > Logs.
-
Enable automation
Once you’ve confirmed the integration works as expected, enable the automation:
-
In the Admin Center or Settings, navigate to Services and Integrations > Scheduled Tasks. In the Settings App, the section name is Services > Scheduled Tasks.
-
Open the task named Dell Warranty.
-
Review the default schedule and adjust it, if needed. The schedule uses the server's local time.
TIP: For optimal performance, we recommend running the task during off-peak hours when the server load is minimal.
-
Select the Enabled checkbox to activate the scheduled task.
-
Click OK to save the changes.
Now, the integration runs automatically according to your schedule.