Customizing forms for displaying objects
Updated in 2023.2
The Self Service Portal uses View Forms to display object details for Computers,
NOTE: The appearance of Announcements and Knowledge Base Articles in the Self Service Portal is controlled via standard cascading style sheet (CSS) rules. For instructions, see Customizing Style Sheets.
NOTE: The Self Service Portal may show some additional object properties. For example, the
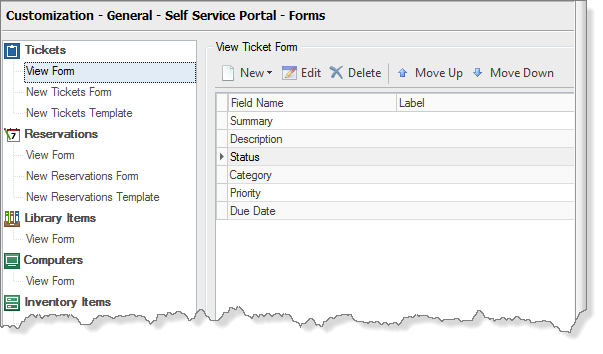
To customize the View Form for an object class:
- From the Sidebar, navigate to Customization > General > Self Service Portal > Forms.
- The navigation bar on the left hand side displays separate sections for objects that are available in the Self Service Portal: Tickets, Equipment Reservations, Library Items, Computers, and Inventory Items. Scroll to an object class and review the contents of the View Form. Customize it as needed:
- To add a new field:
- Click New > Field. The Form Field dialog box opens.
- Select a field name from the Name list.
- Type a field label in the Label field. If you want to use default labels, leave the Label field blank.
- Click OK.
Repeat these steps to create additional fields. To remove a field from the View Form, select it and click Delete.
- To add a section separator:
- Select a field under which you want to add a section separator and click New > Section. The Section dialog box opens.
- Type a caption for the section. To create a section with no caption, leave the Section caption field empty.
- Click OK.
Repeat these steps to create additional sections as needed. To remove a section separator, select it and click Delete.
- To add text or a hyperlink:
- Click an element (a separator or field) under which you want the text or hyperlink to appear and click New > Text. The Text dialog box opens.
- Type your text. To insert dynamic values, click Insert Placeholder and select a value using the Select Placeholder dialog box.
INFO: For details, see Inserting Placeholders.
- If you want this text to become a hyperlink, provide the full path for the hyperlink in the URL field. To insert dynamic values, click the ellipsis button and select a value using the Select Placeholder dialog box.
NOTE: The Self Service Portal supports only these types of hyperlinks:
http,https,ftp,ftps, andfile(in Google Chrome, links to local files are disabled). - Click OK.
- To add a new field:
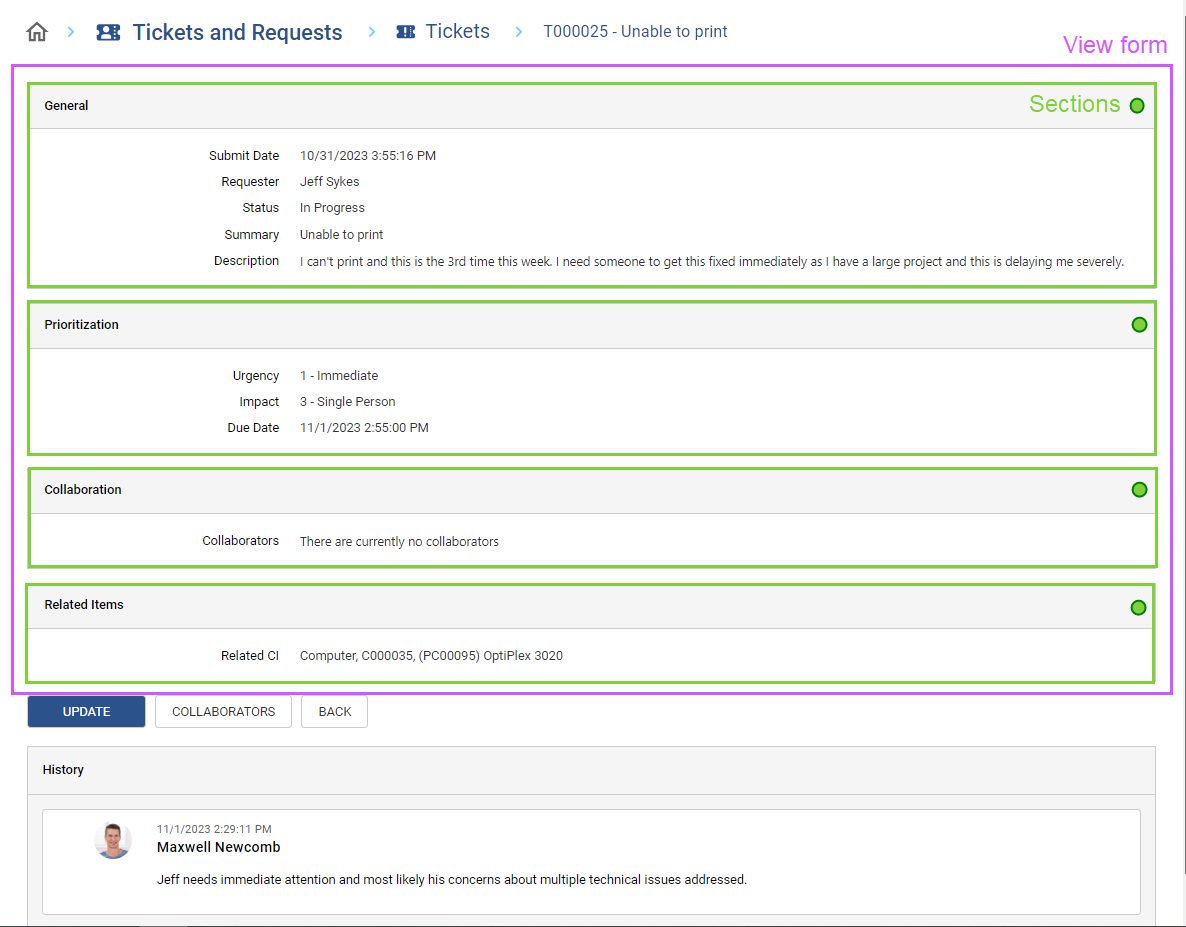
- All elements appear on the View Form in the order they are listed. If you want to change their display order, use the Move Up and Move Down buttons.
- Click Save.
See the figure below to see how the View Form displayed above is defined.