Defining Holidays and Non-Standard Working Hours
Alloy Navigator uses Exception Lists to override the defined working and non-working hours, such as holidays, early dismissals, emergency shifts, and other non-standard working and non-working hours. You may need several Exception Lists for your work calendars. For example, an international company with offices spread out in three different countries may require three Exception Lists for the national holidays specific to each country.
After you have defined an Exception List, you apply this list to a work calendar. Exception Lists are reusable: you can apply the same list to several work calendars and use multiple Exception Lists with the same work calendar.
To define
- From the Sidebar, navigate to General >
- Under Holidays and Exceptions, click New. The New Exception List dialog box opens.
- Type in a name of the Exception List.
-
- To add a holiday:
- Click Add > Holiday. The Holiday dialog box opens.
- Type the name of the holiday to be added (e.g. Labor Day, Thanksgiving, etc.).
- Depending on the holiday type, click one of three available options and specify the date as follows:
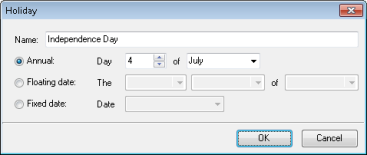
- Annual — A holiday that occurs on the same date every year, such as Independence Day in the USA, which is celebrated every year on July 4.
In the Day field, enter the day of month and select the month from the drop-down list (see figure below).
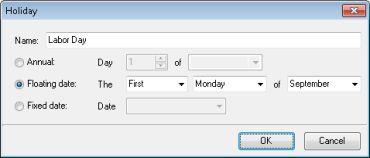
- Floating date — A floating-date holiday that occurs on a fixed day of the week and repeats every year, such as Labor Day in the USA and Canada, which is celebrated on the first Monday of September, every year.
Select the week of the month, the week day, and the month from the drop-down lists (see figure below).
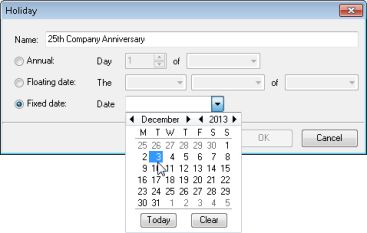
- Fixed date — A fixed-date holiday that occurs on a fixed date and does not necessary repeat every year, such as a company anniversary that is not necessarily celebrated every year.
Click the down arrow in the Date field to bring up the calendar and select a date (see figure below).
- Annual — A holiday that occurs on the same date every year, such as Independence Day in the USA, which is celebrated every year on July 4.
- Click OK.
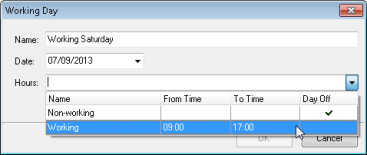
- To add a working day with non-standard working hours (such as a working Saturday):
- Click Add > Working Day. The Working Day dialog box opens.
- Type the name of the working day (e.g. Working Saturday).
- Enter the date of this working day.
NOTE: You specify working and non-working hours in the Working Week section
- Click OK.
- To define a custom time interval, which may be a one-day event such as a partial day or overtime, or may last for several days such as company vacation:
- Click Add > Custom Hours. The Custom Hours dialog box opens.
- Type a name for this time period custom hours.
- Specify the start date / time and the end date / time.

- By default, custom hours define non-working time. If your custom hours define non-standard working time such as overtime, select the Is Work Time check box.
- Click OK.
- When done, click OK.